This page was imported from Intercom and may describe older navigation or terminology. Source: https://help.textmine.com/en/articles/9220328-how-to-add-conditional-logic-into-your-scribe-templates
What is conditional logic?
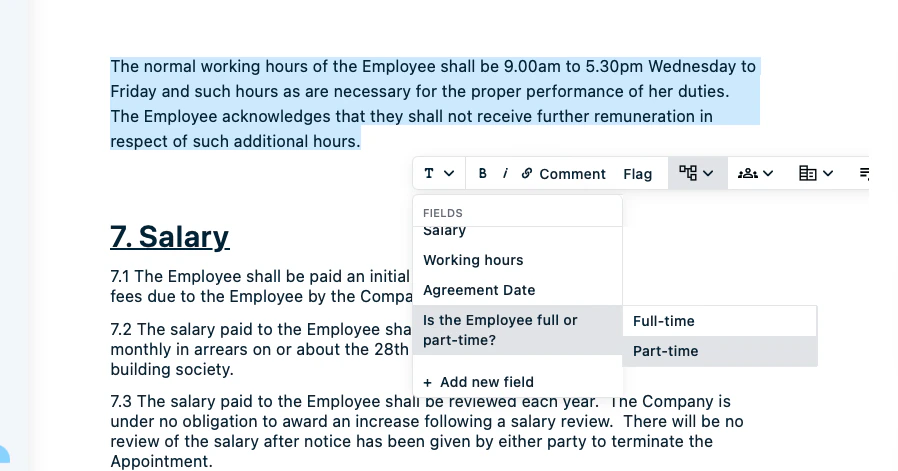
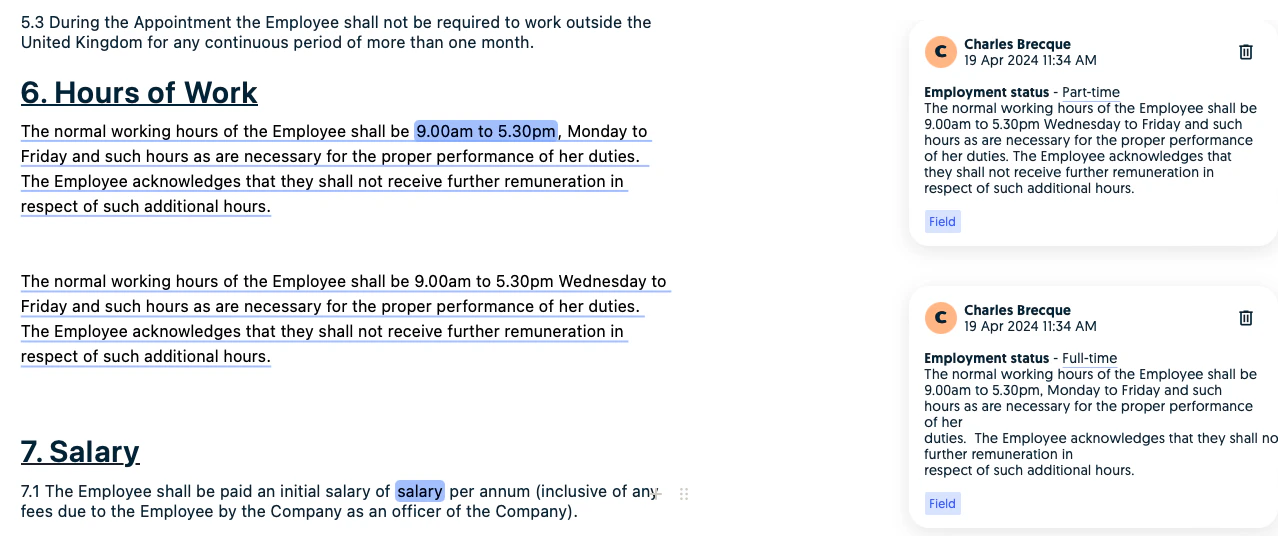
Document templates often contain conditional logic which will affect how the document is rendered based on the different conditions. For example, an employment contract will vary based on whether the employee is full-time or part-time or working remotely. Instead of having multiple templates for each situation, Scribe allows you to define how the template should render in each of these situations so that it’s easier to maintain consistency between your templates. This also simplifies the management of your templates as you only need to manage one template. Finally, configuring a conditional template into a document is much easier for the users as they’ll just need to answer a conditional question as opposed to making edits to the templates themselves.How to introduce conditional logic in Scribe?
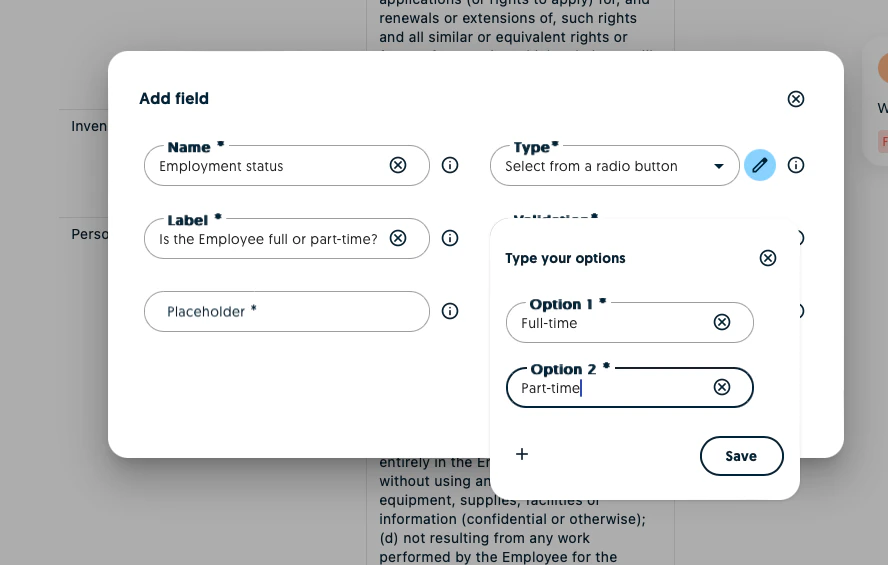
You’ll first need conditional fields to introduce conditional into your template. If you don’t already have one, click on the field settings icon and create a new field.