X-TextMine-Api-Key. OAuth-based Microsoft marketplace flows use the same central MCP URL so TextMine can resolve the user, organization, and environment server-side.
Which setup path should I use?
Think of Copilot Studio as the place where the agent gets TextMine as a tool. The TextMine MCP Azure Marketplace listing handles the Copilot Studio connection path.
For general Microsoft setup details, see Microsoft’s guides for connecting an existing MCP server to a Copilot Studio agent and adding MCP tools to an agent.
Before you start
You need:- Access to Microsoft Copilot Studio and the environment where the agent lives.
- Permission to add Azure Marketplace and MCP tools to the agent.
- Access to the TextMine MCP Azure Marketplace listing in that environment.
- A TextMine OAuth connection or a TextMine API key for the TextMine organization the agent should use, depending on the connection flow. TextMine API keys use the
tm_...format. - Confirmation that any required TextMine features, Vaults, integrations, and task-agent email routes have been activated for that organization.
https://developers.textmine.com/mcp; that is the developer hub MCP endpoint for API reference discovery, not the TextMine product MCP server.
Store TextMine credentials only in the Copilot Studio connection or OAuth vault. Do not paste API keys, OAuth tokens, client secrets, or refresh tokens into agent instructions, prompts, chat transcripts, screenshots, app manifests, or documentation.
Tutorial: create a new agent and add it to Teams
Use this path when you are starting from a blank Copilot Studio agent and want users to chat with TextMine from Microsoft Teams.Create the agent
- Go to Copilot Studio.
- Select the environment where the TextMine connection should live.
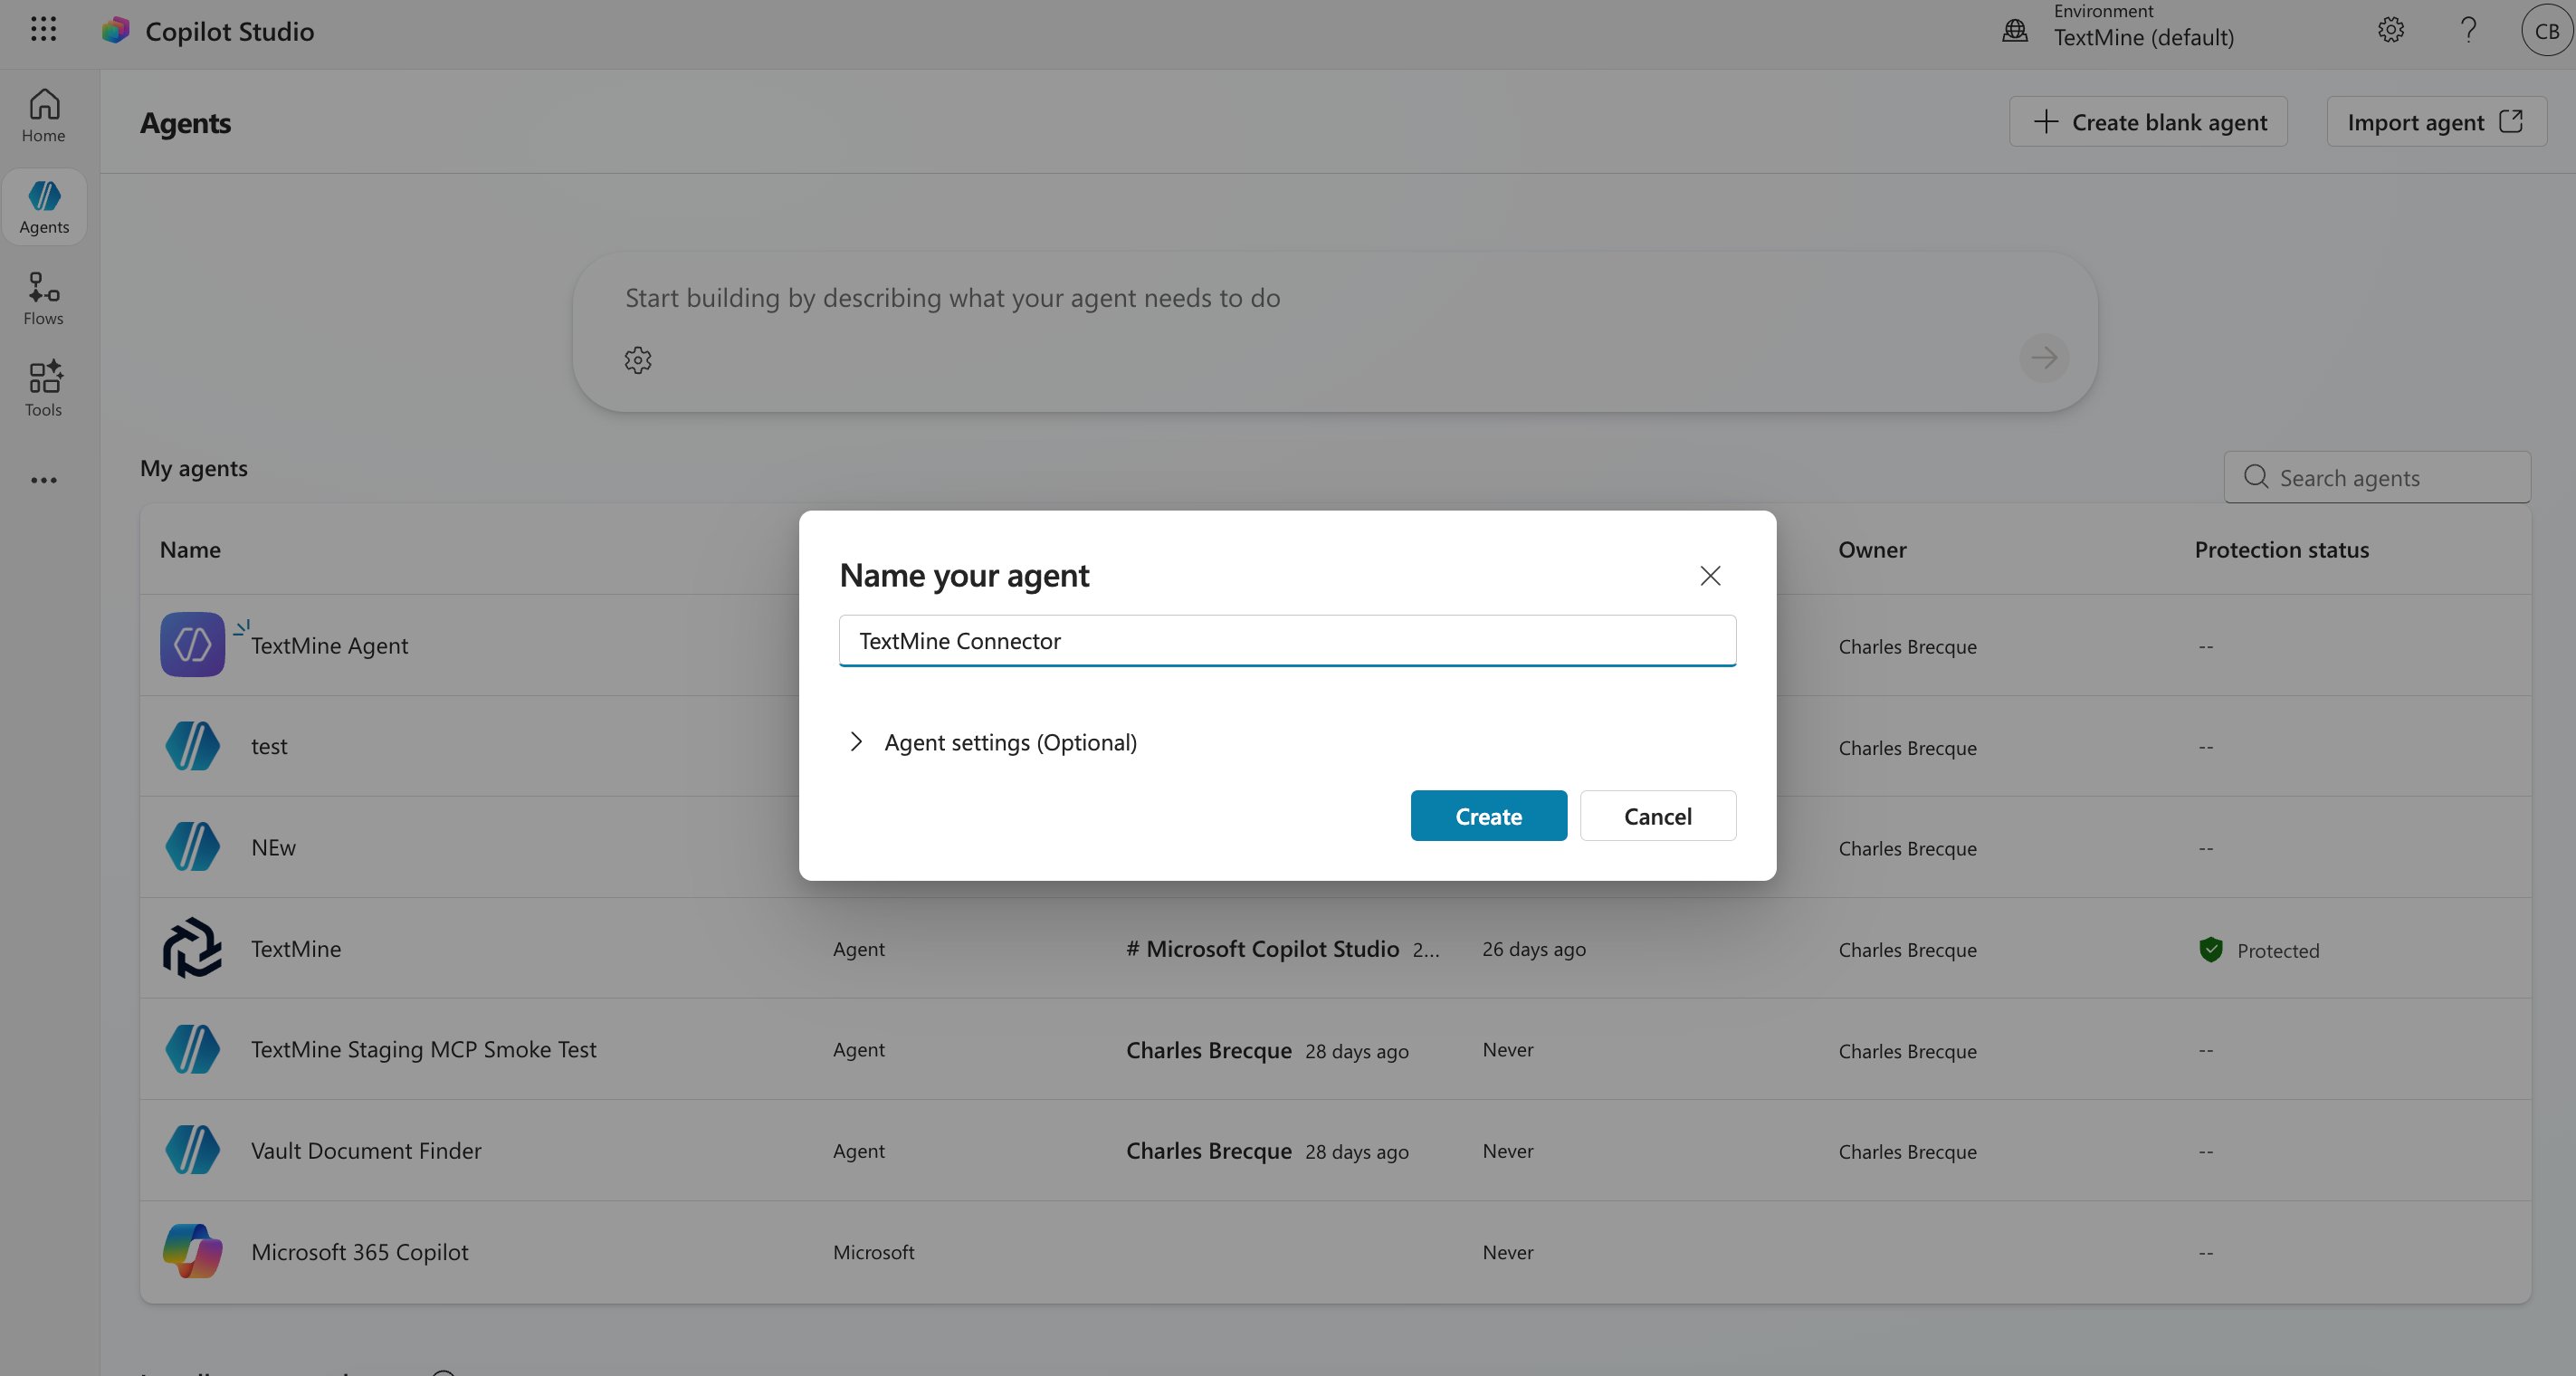
- Create a new agent.
- Give the agent a name and instructions that match the TextMine work it should support.
- Save the agent.
Add TextMine MCP as a tool
- In the saved agent, select Add a tool.
- Select New tool if Copilot Studio asks whether to create or reuse a tool.
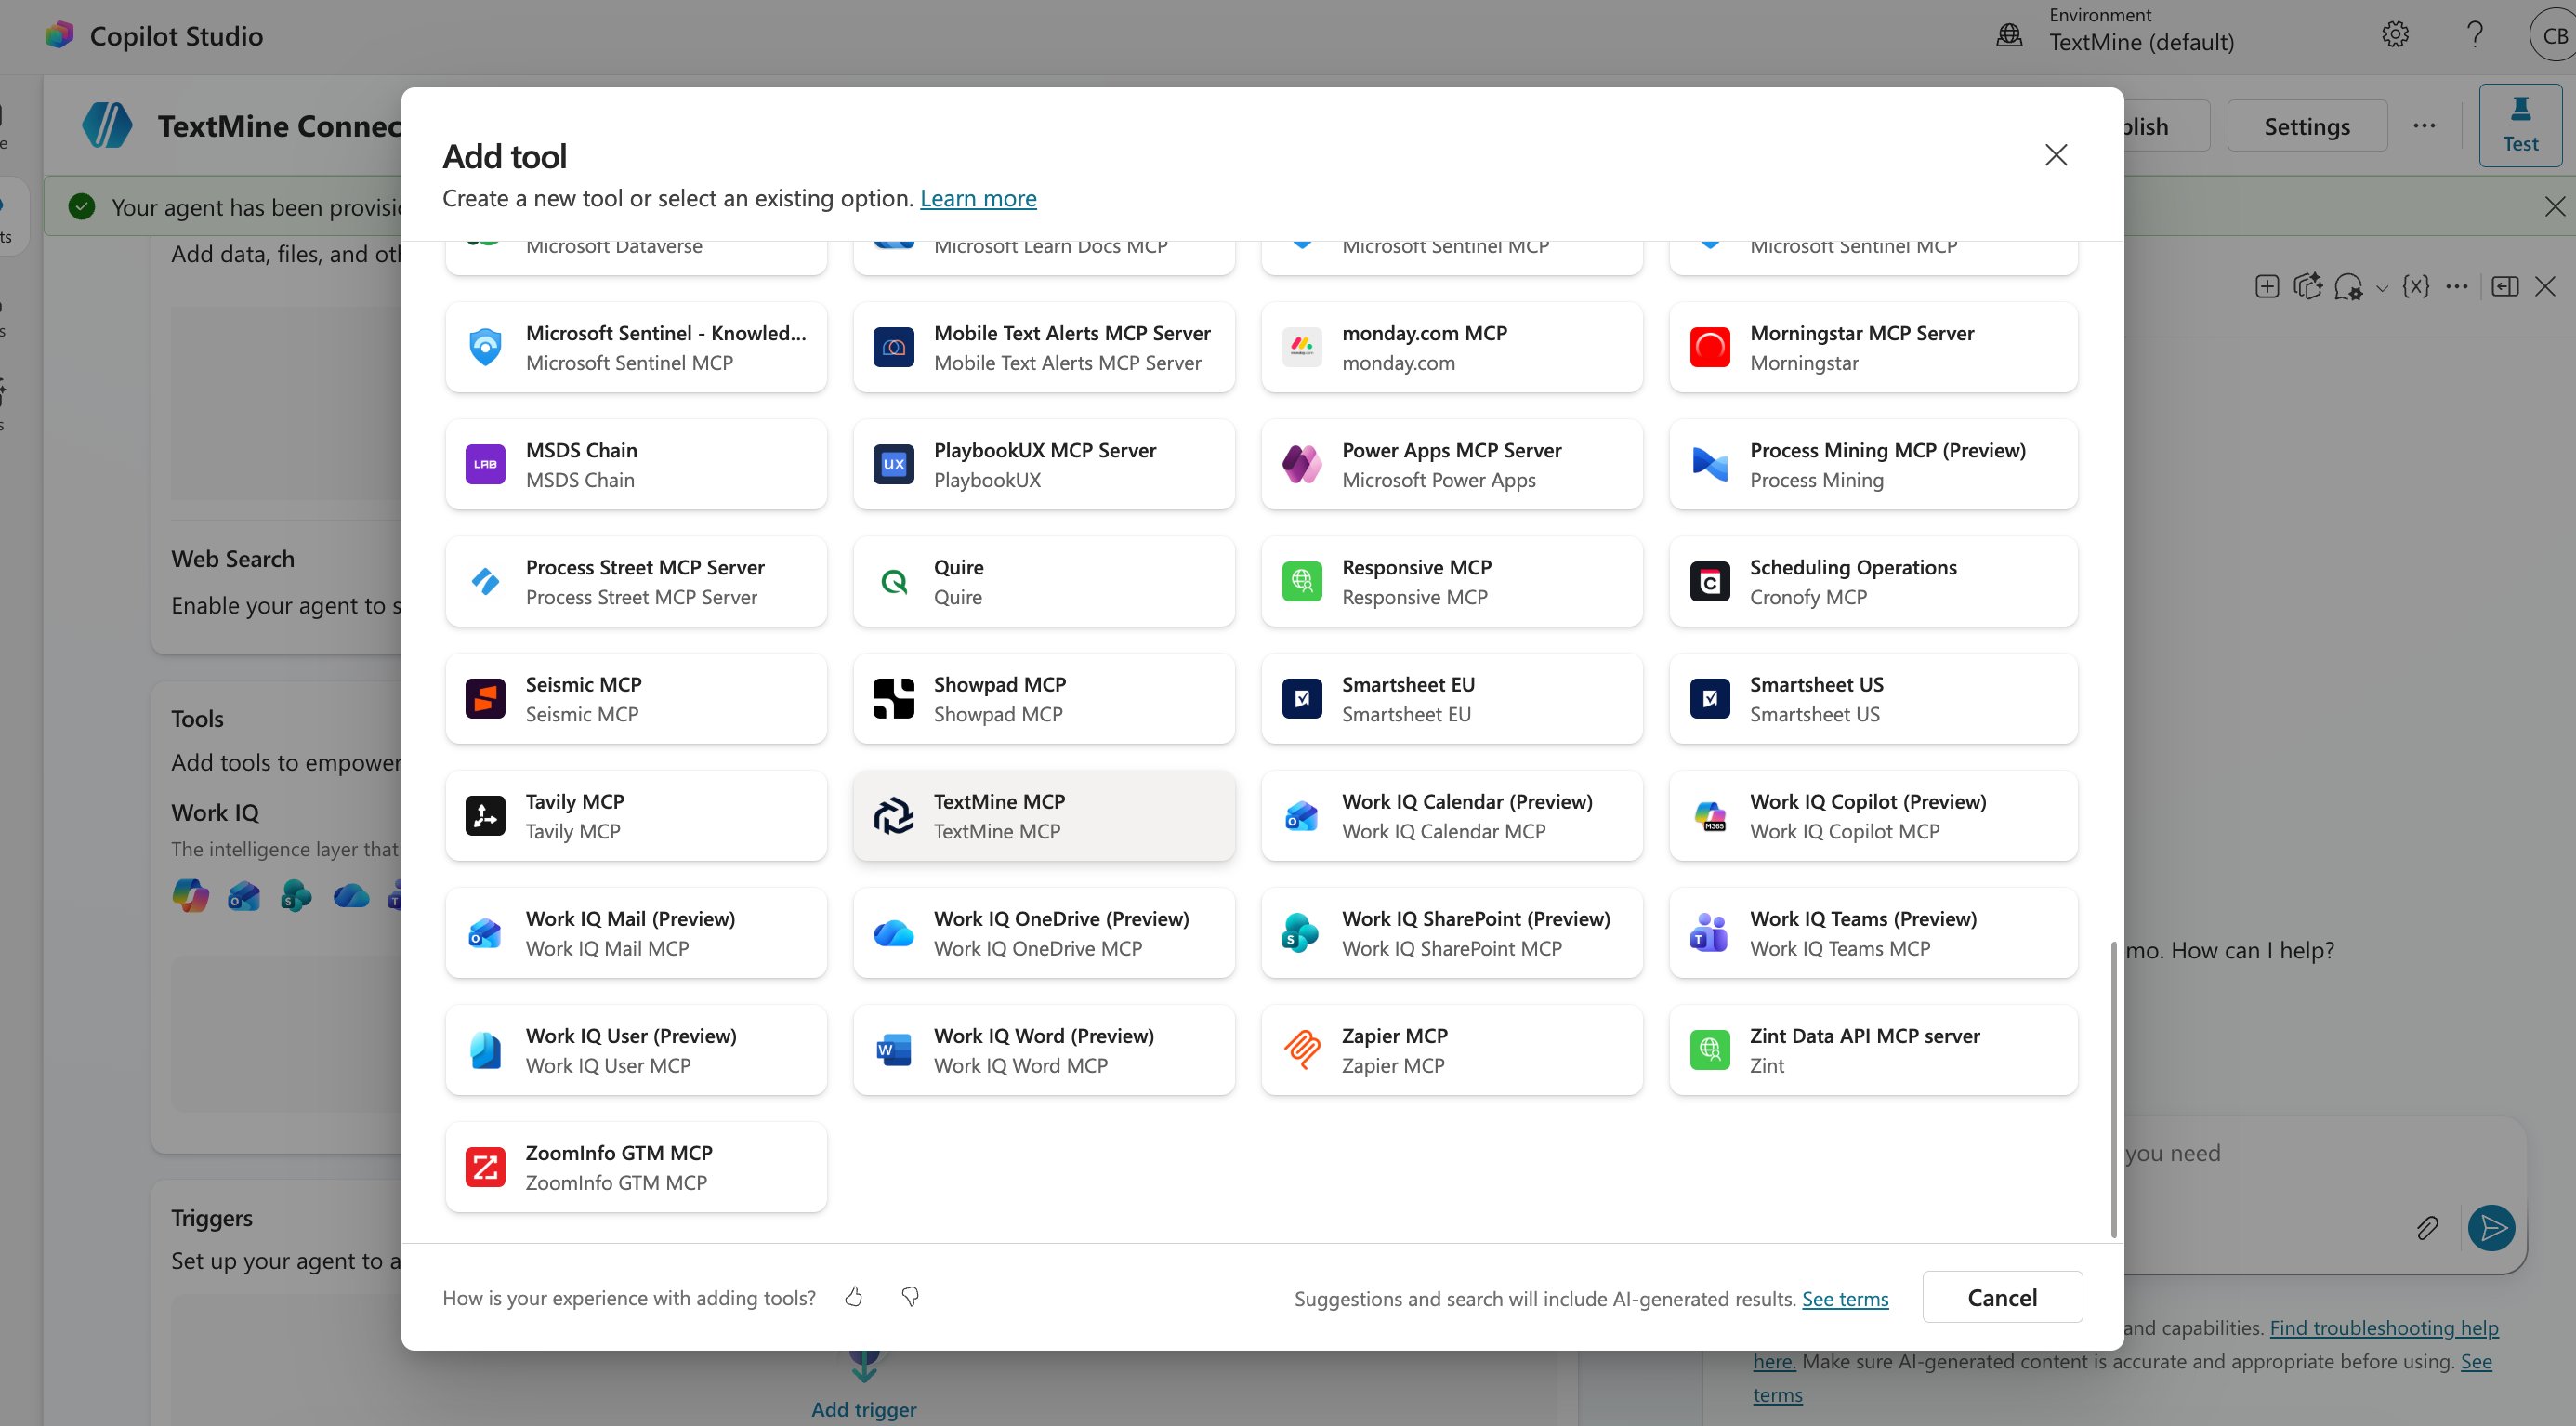
- Open the Model Context Protocol tab.
- Select TextMine MCP from the list.
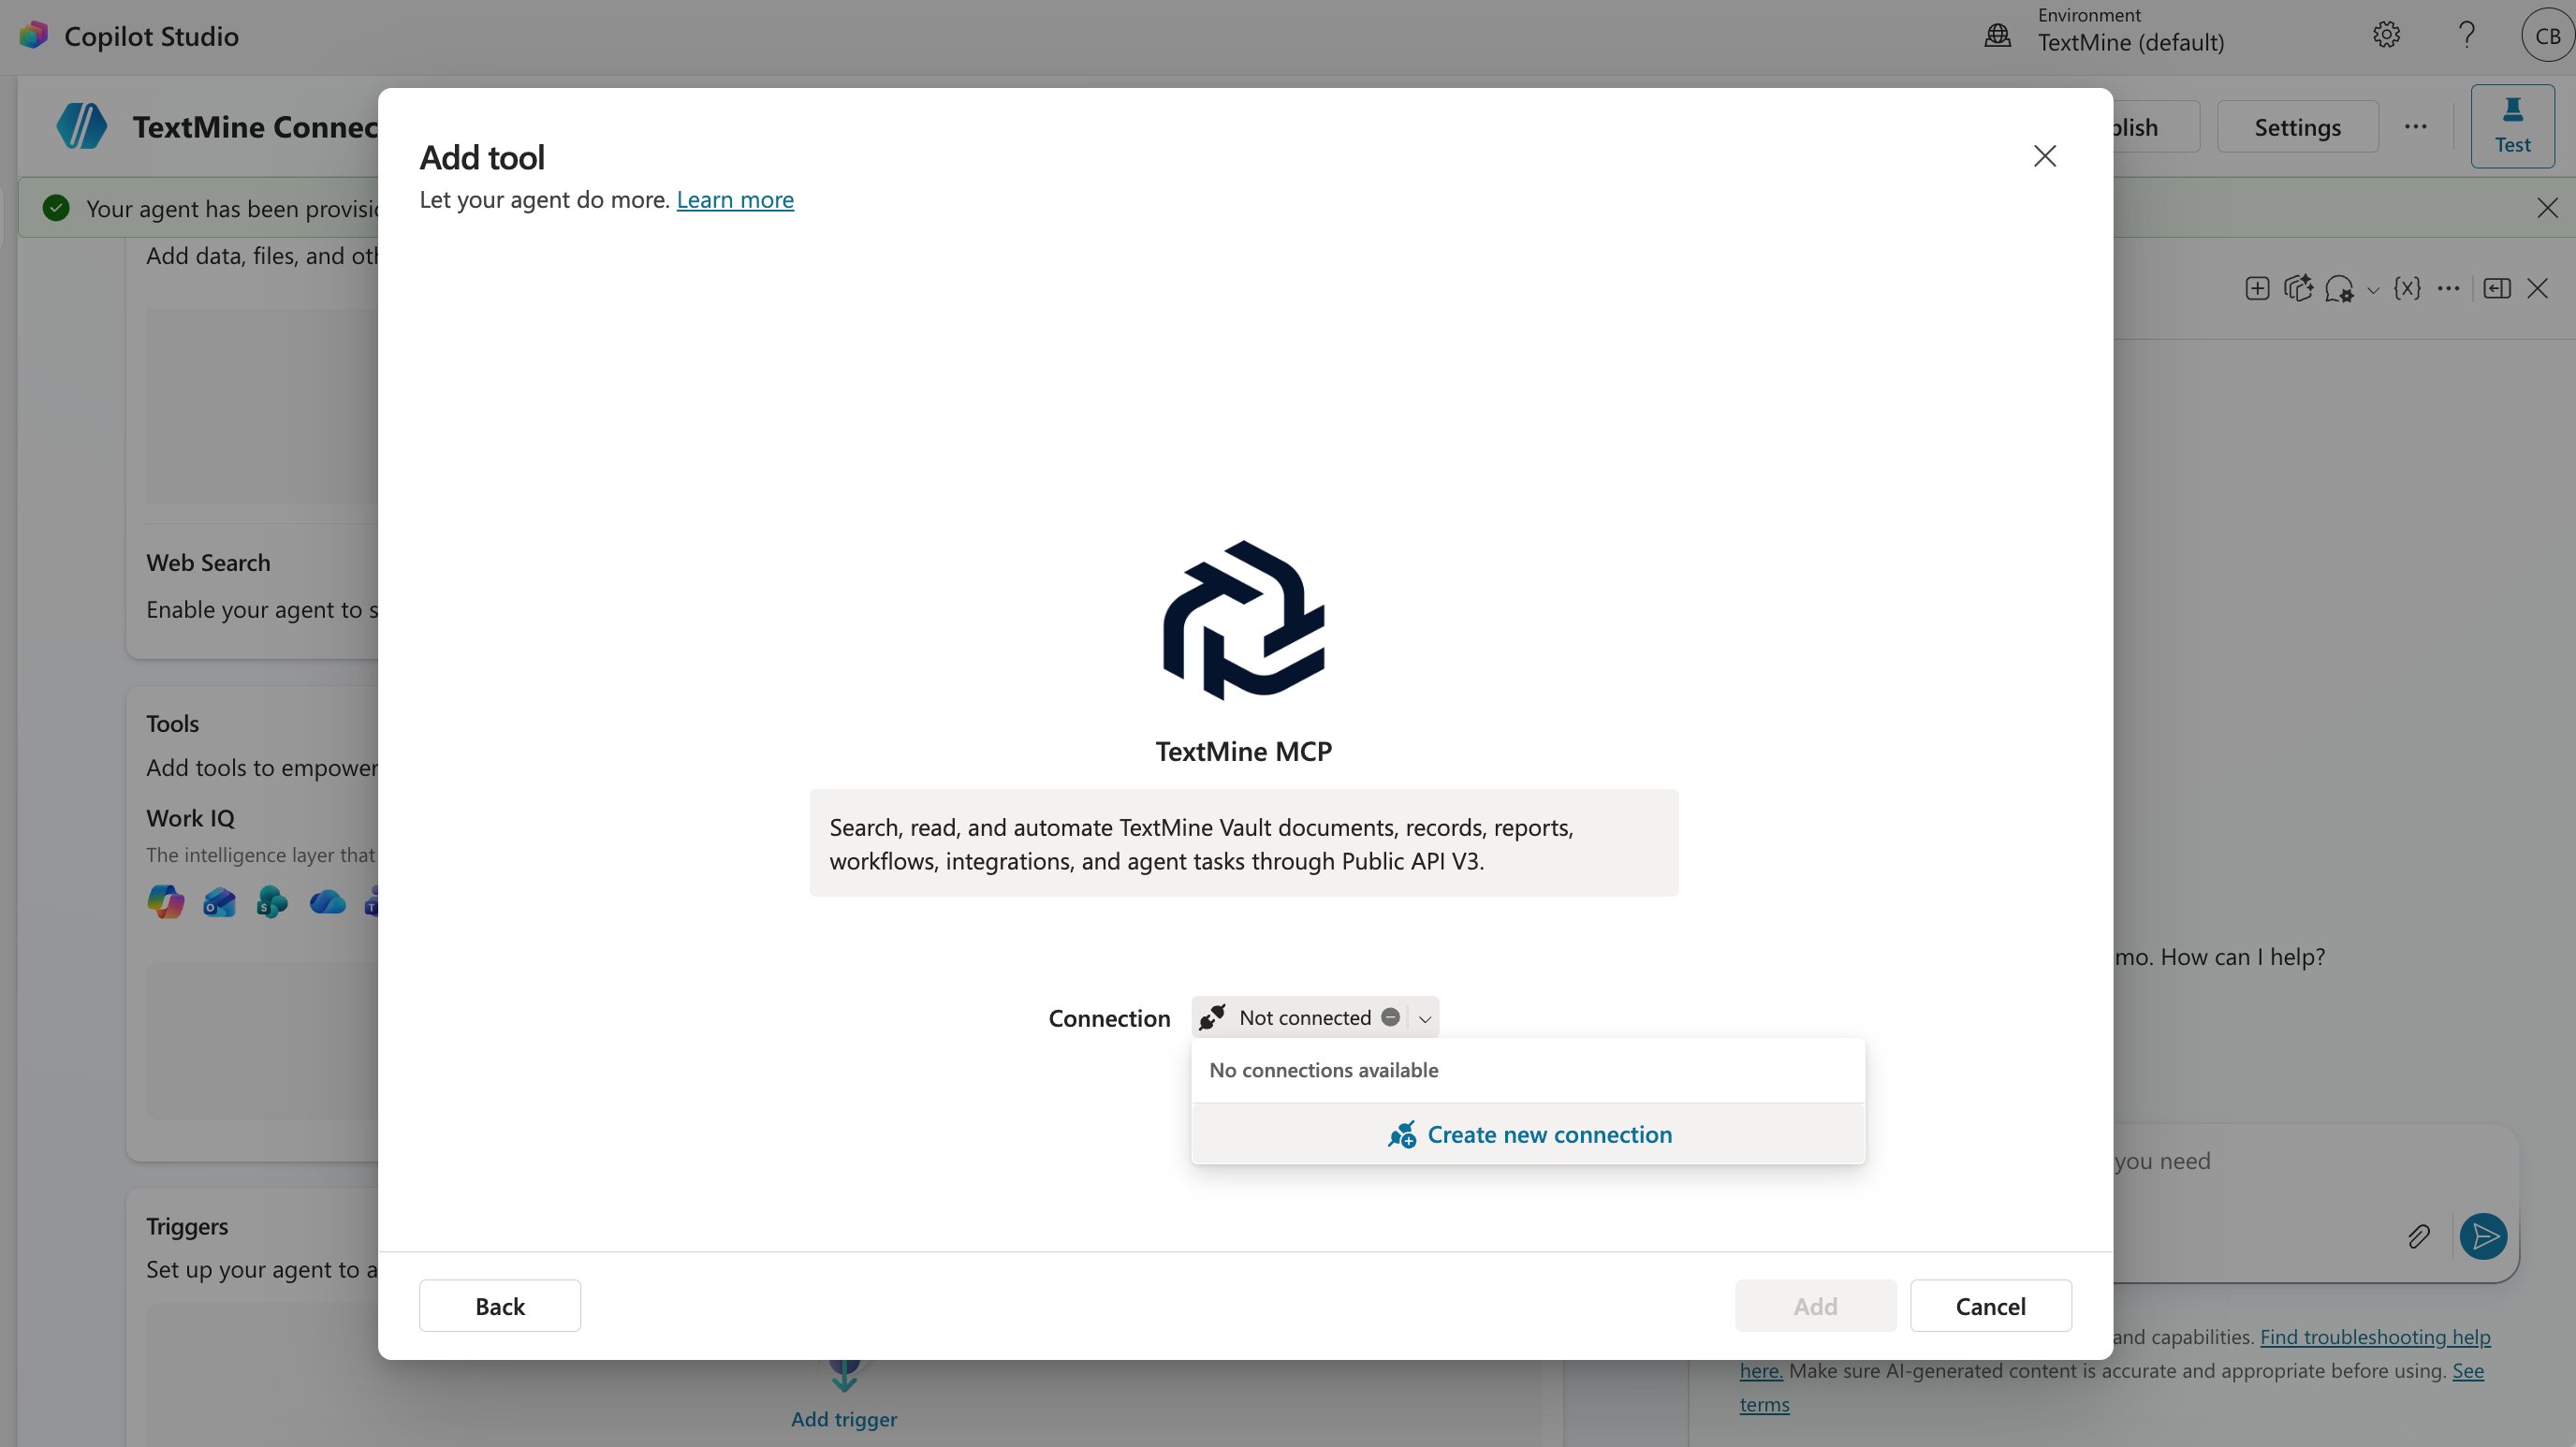
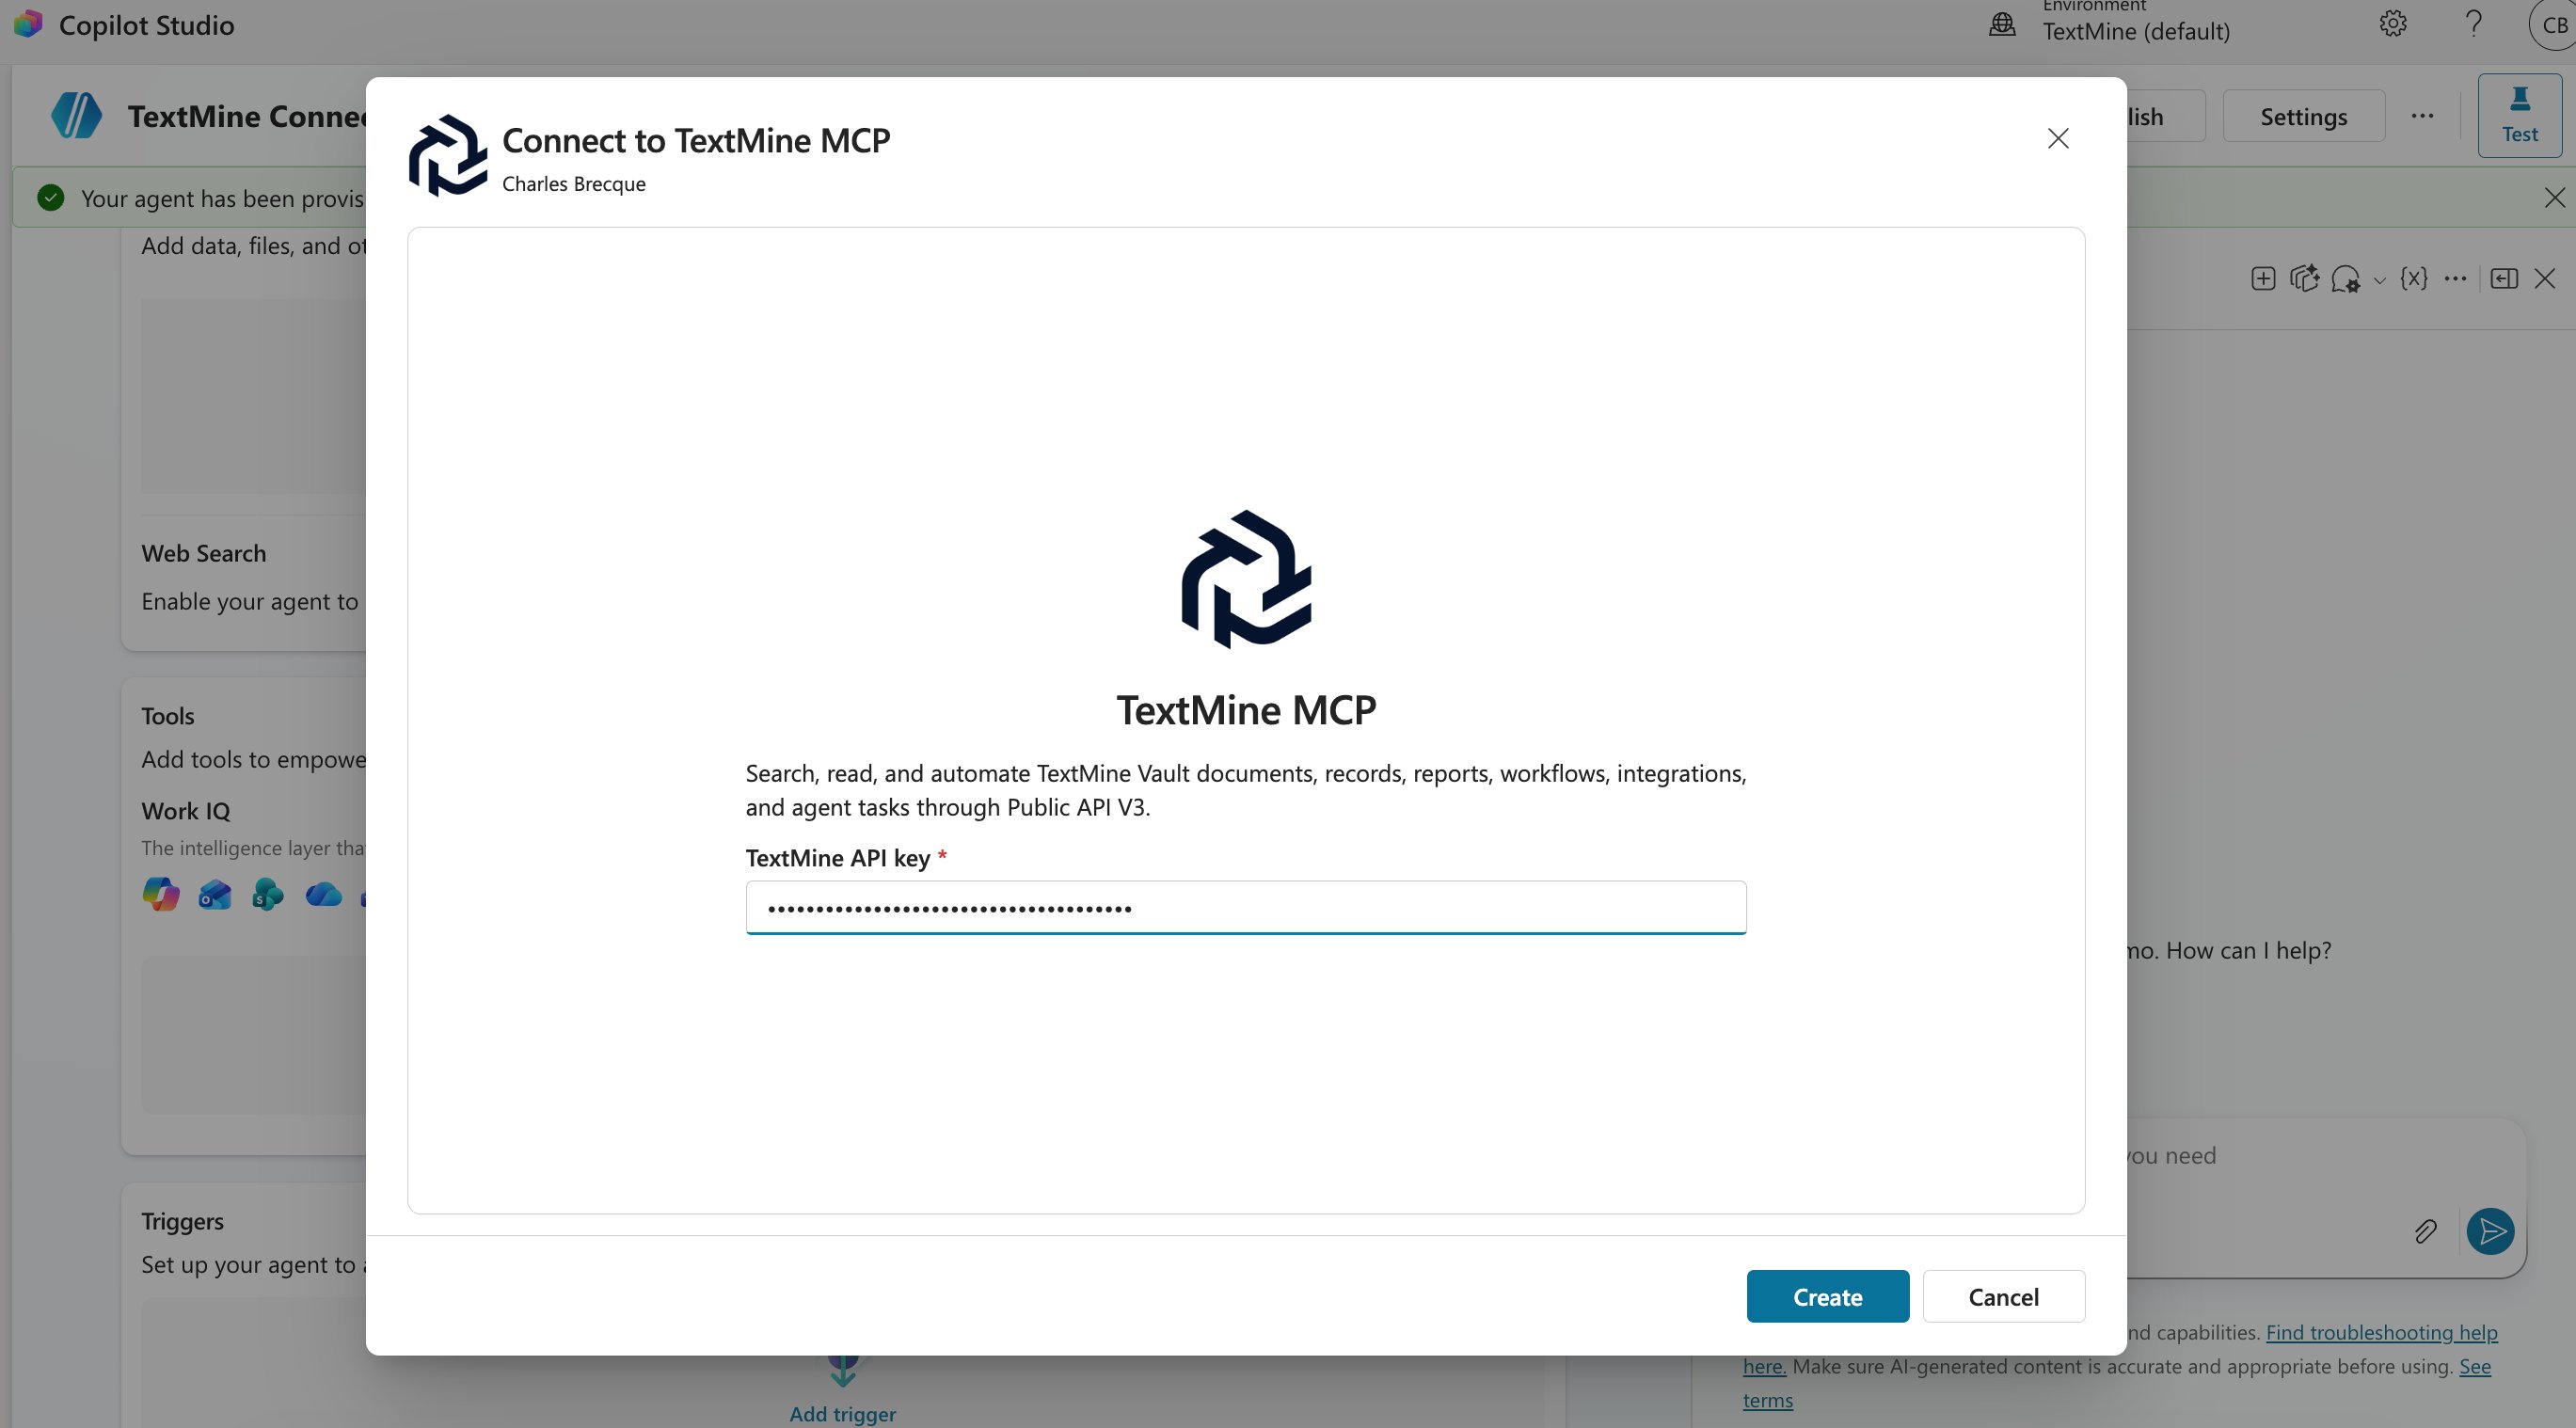
- Select Create connection when Copilot Studio asks for a connection.
- Complete the OAuth authorization flow, or paste the TextMine API key supplied by TextMine if Copilot Studio prompts for an API-key connection. TextMine API keys use the
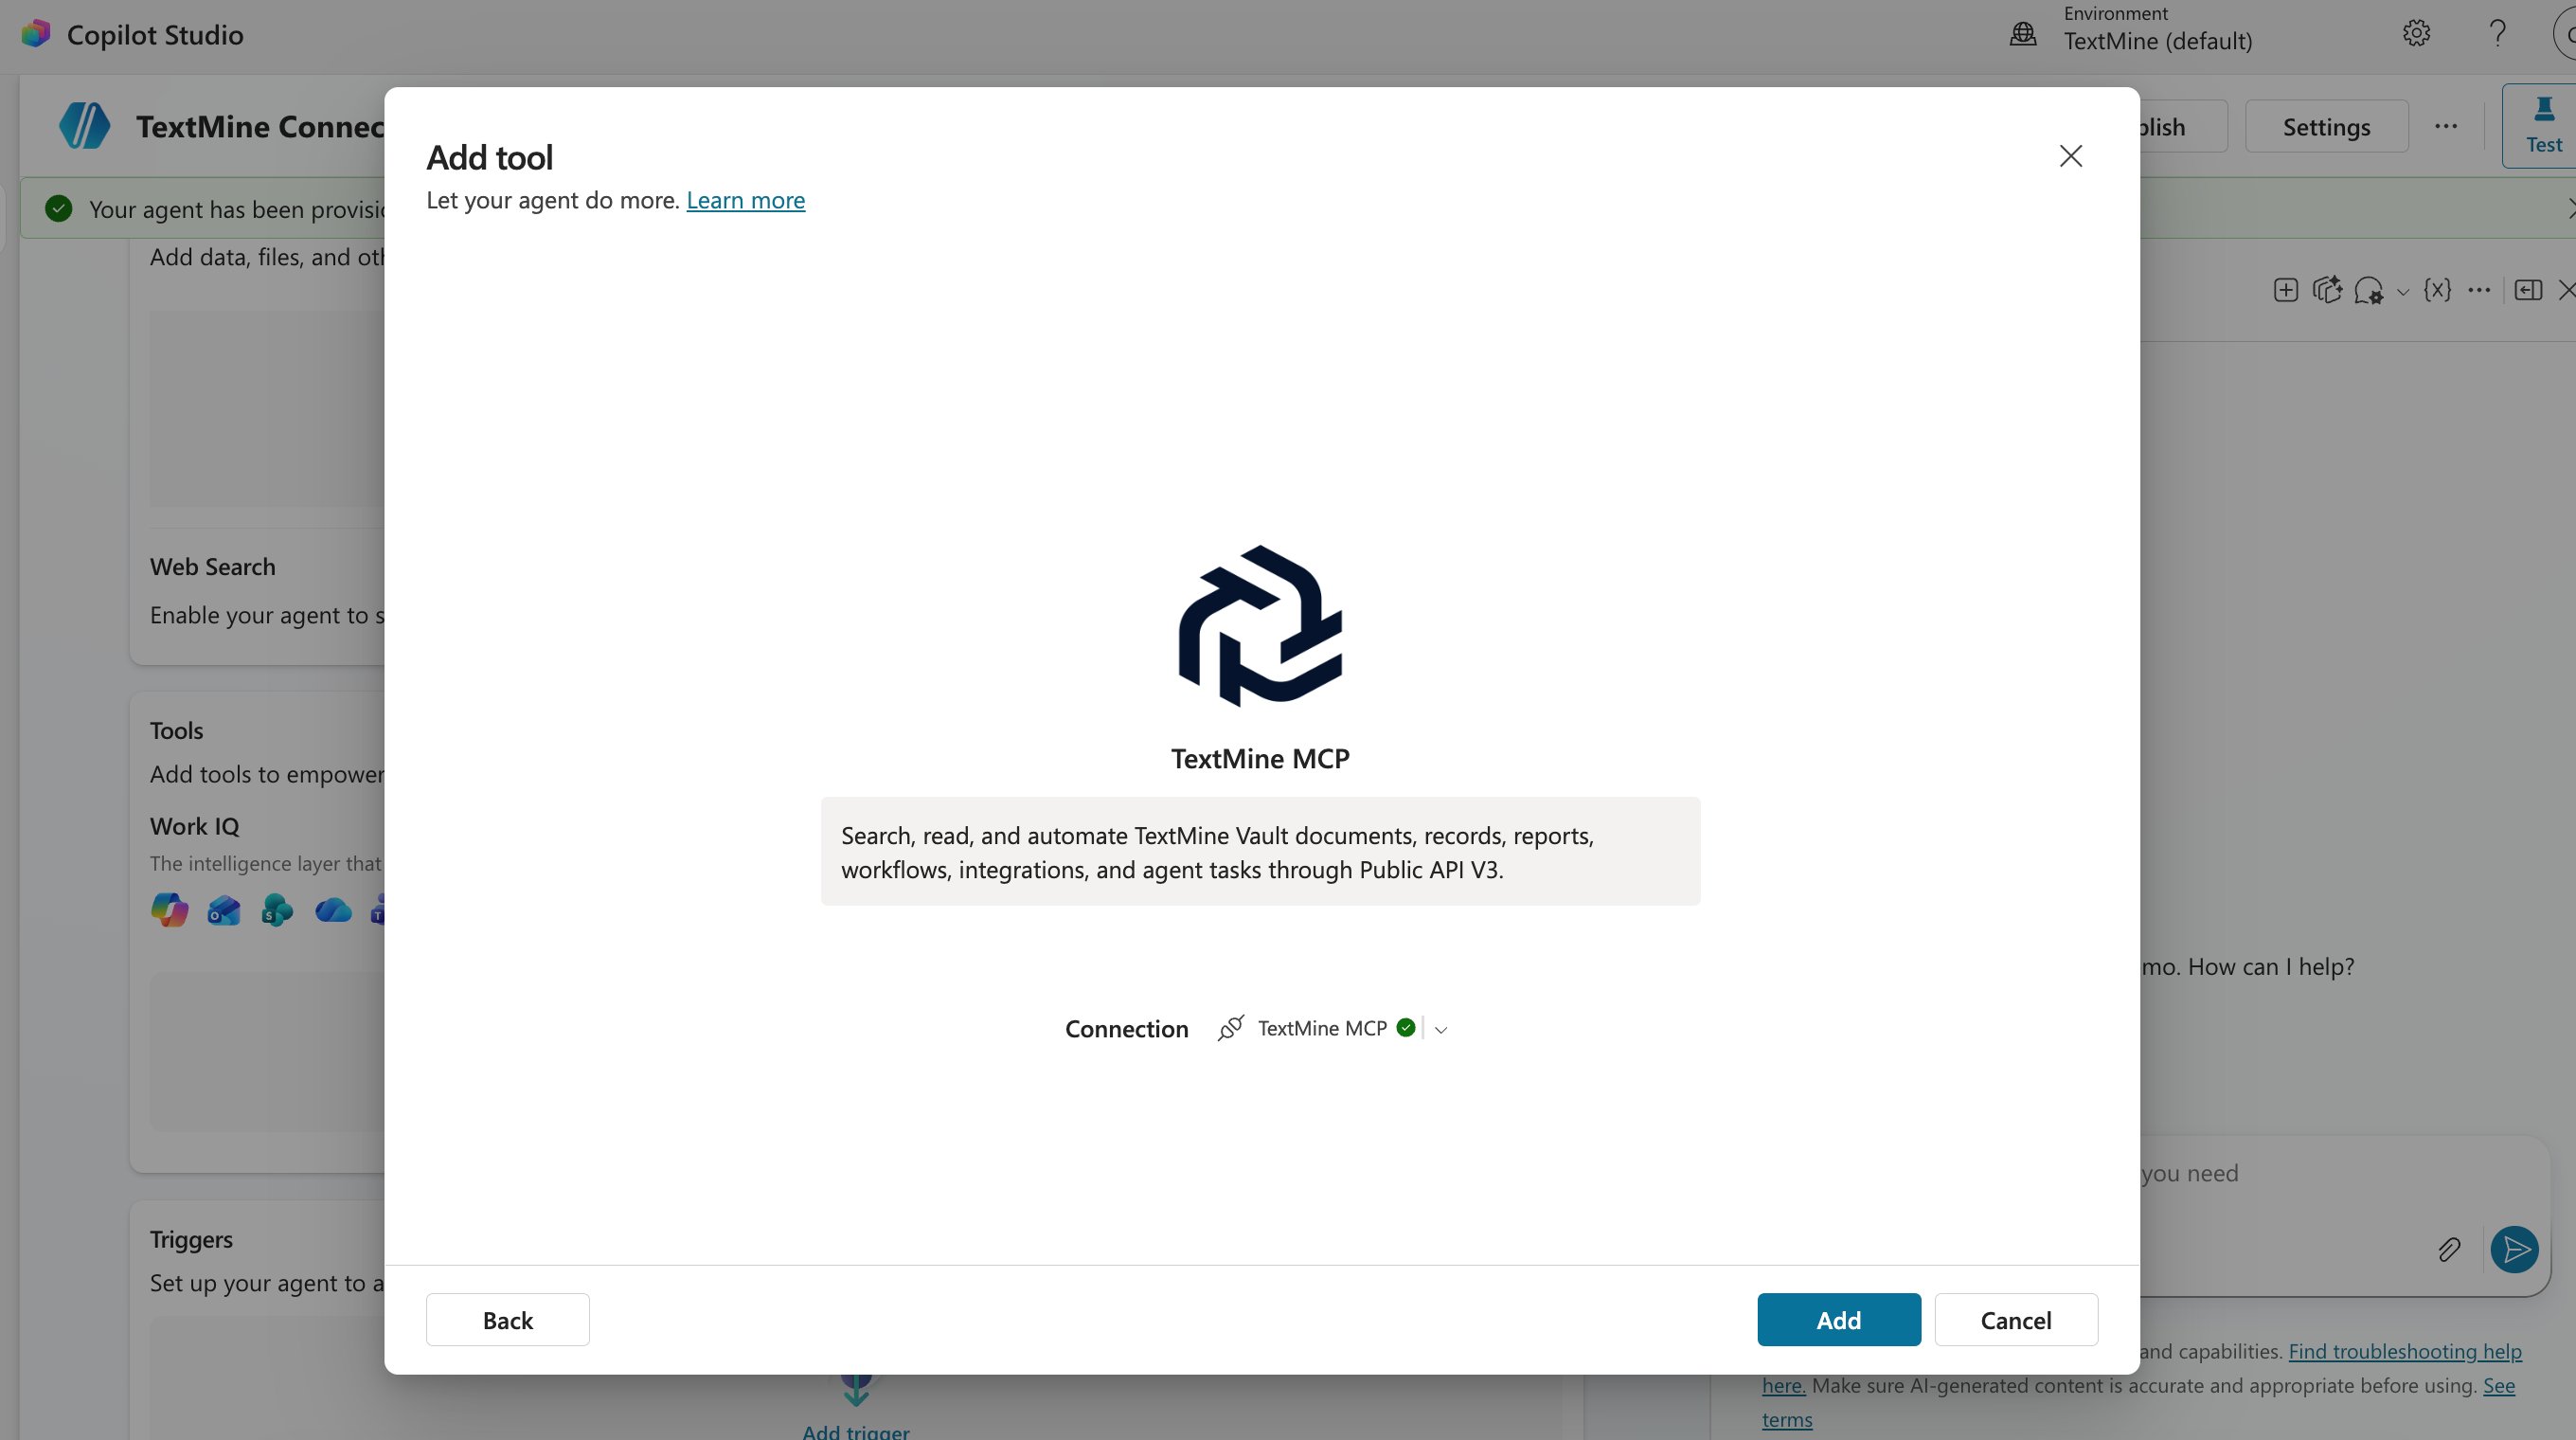
tm_...format. - Create or authorize the connection, then add the TextMine MCP tool to the agent.
- Review the discovered tools and choose whether the agent can use all TextMine tools or only selected tools.
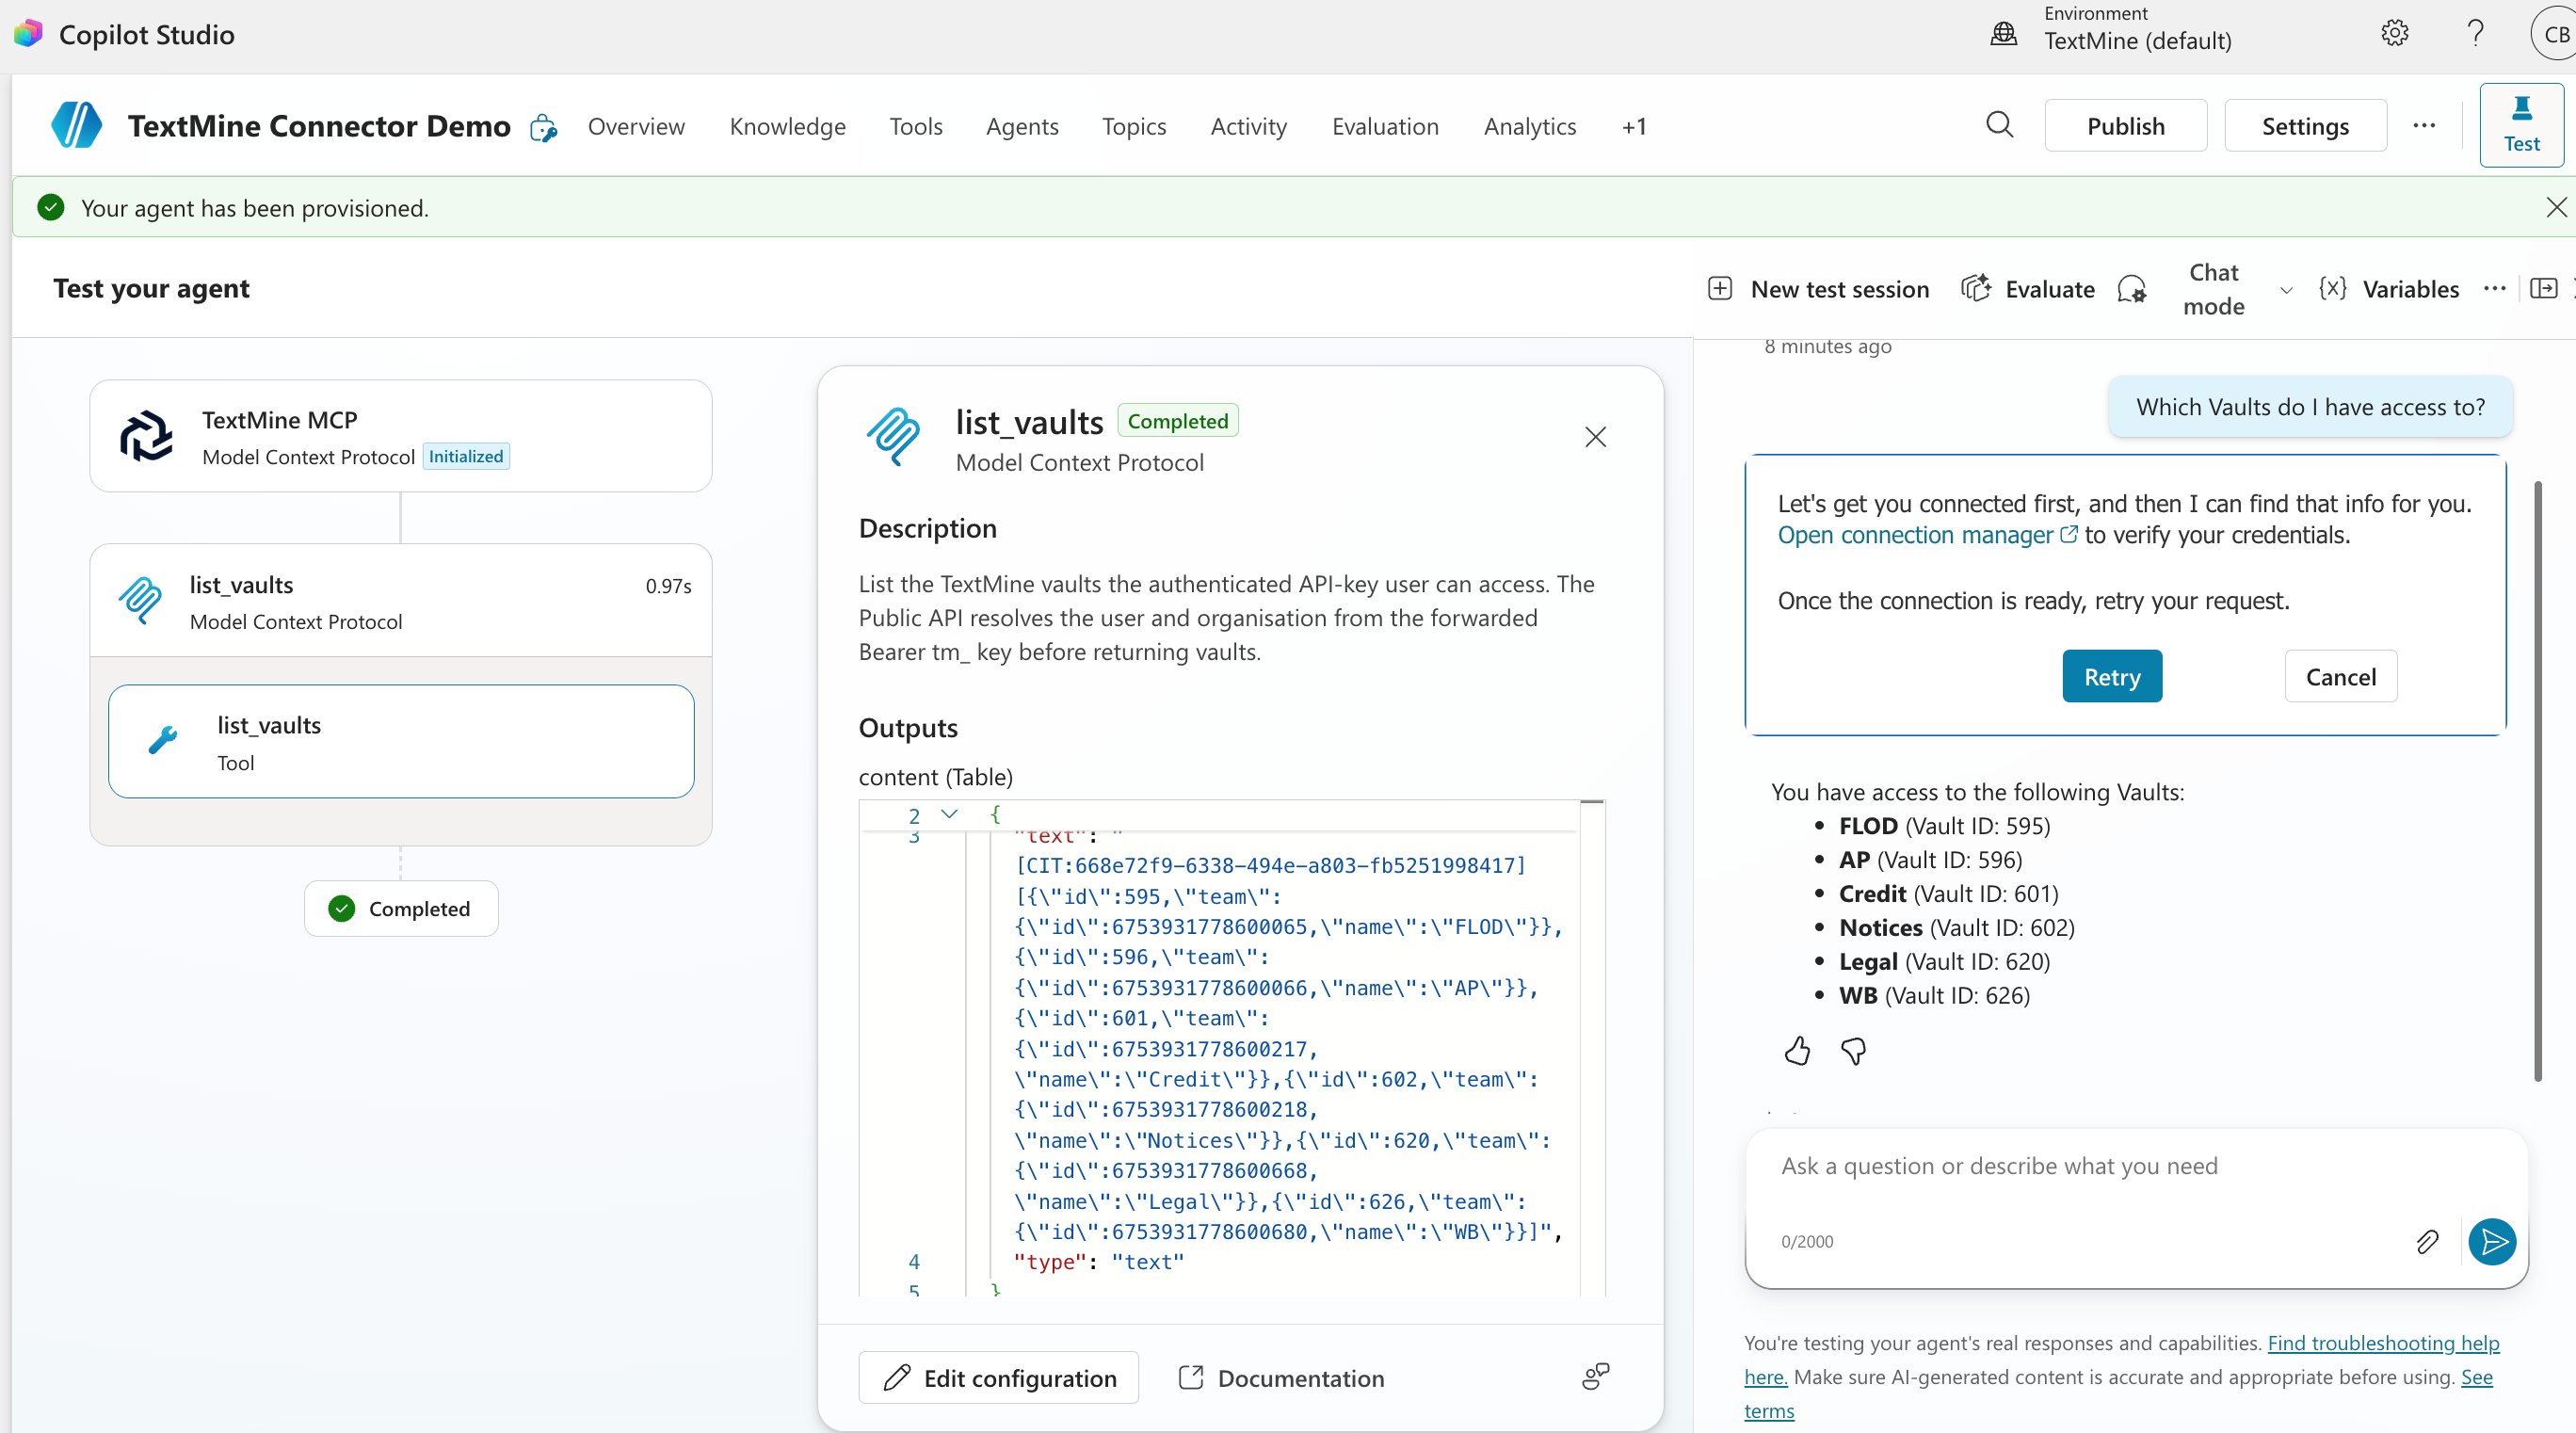
Test the agent
- Open Test your agent.
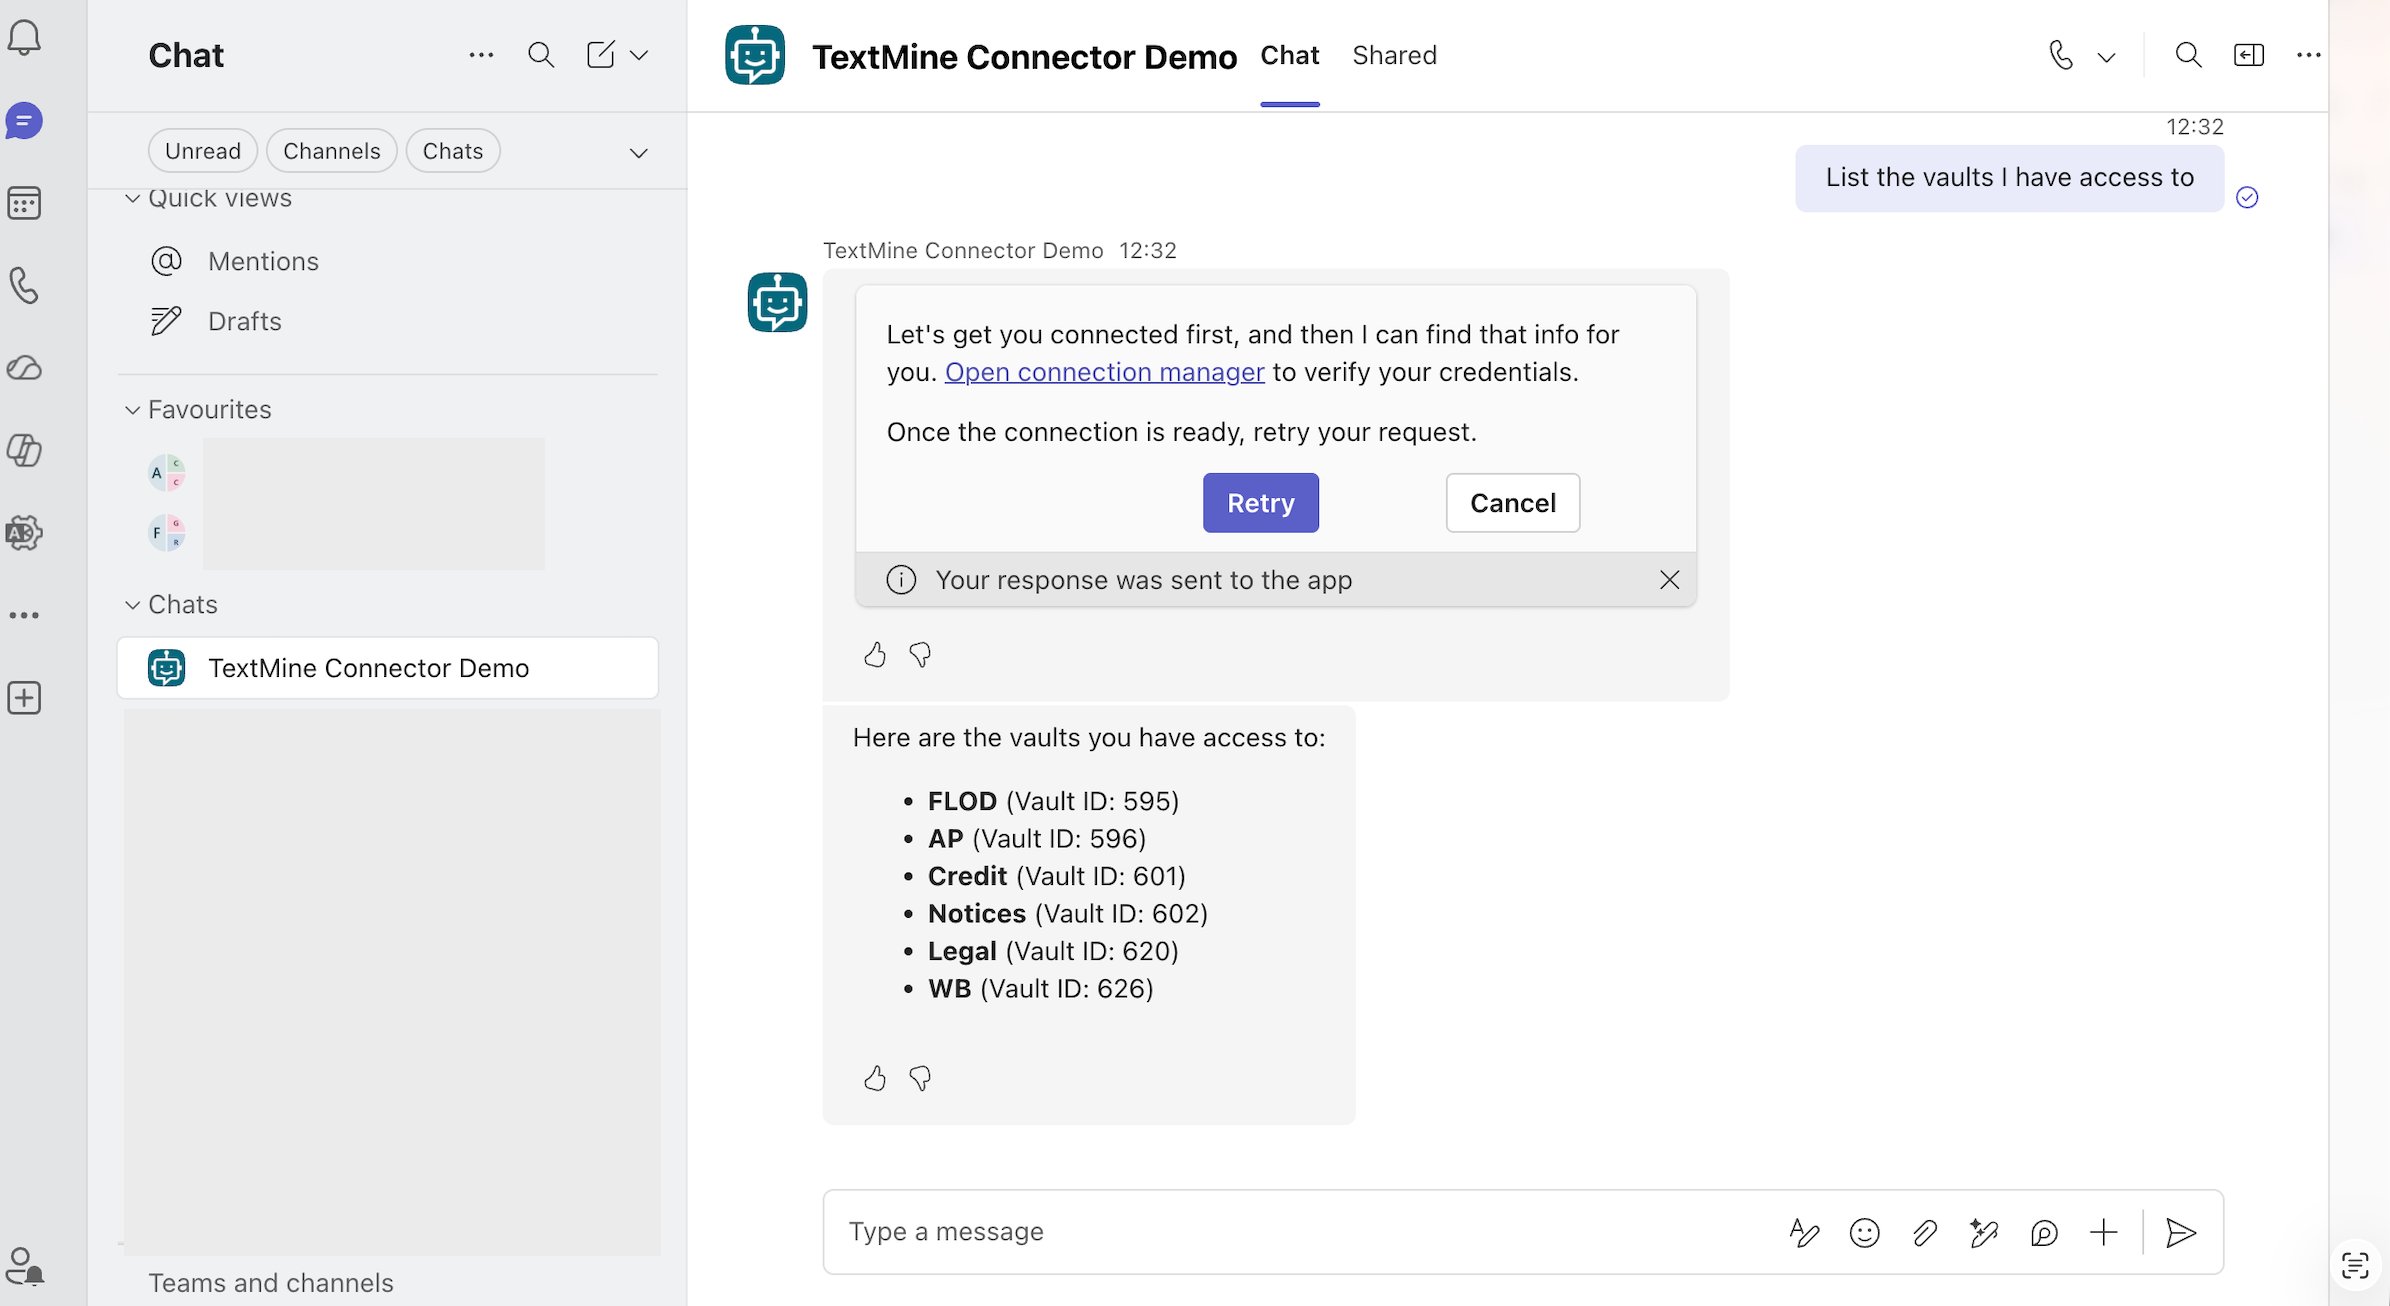
- Ask a low-risk TextMine question, such as listing the Vaults the connection can access.
- Confirm that the answer only uses TextMine data available to the connected OAuth user or API key.
- If Copilot Studio prompts you to reconnect, open the connection manager from the prompt, reconnect the TextMine MCP connection, then test again.

Publish and add the Teams channel
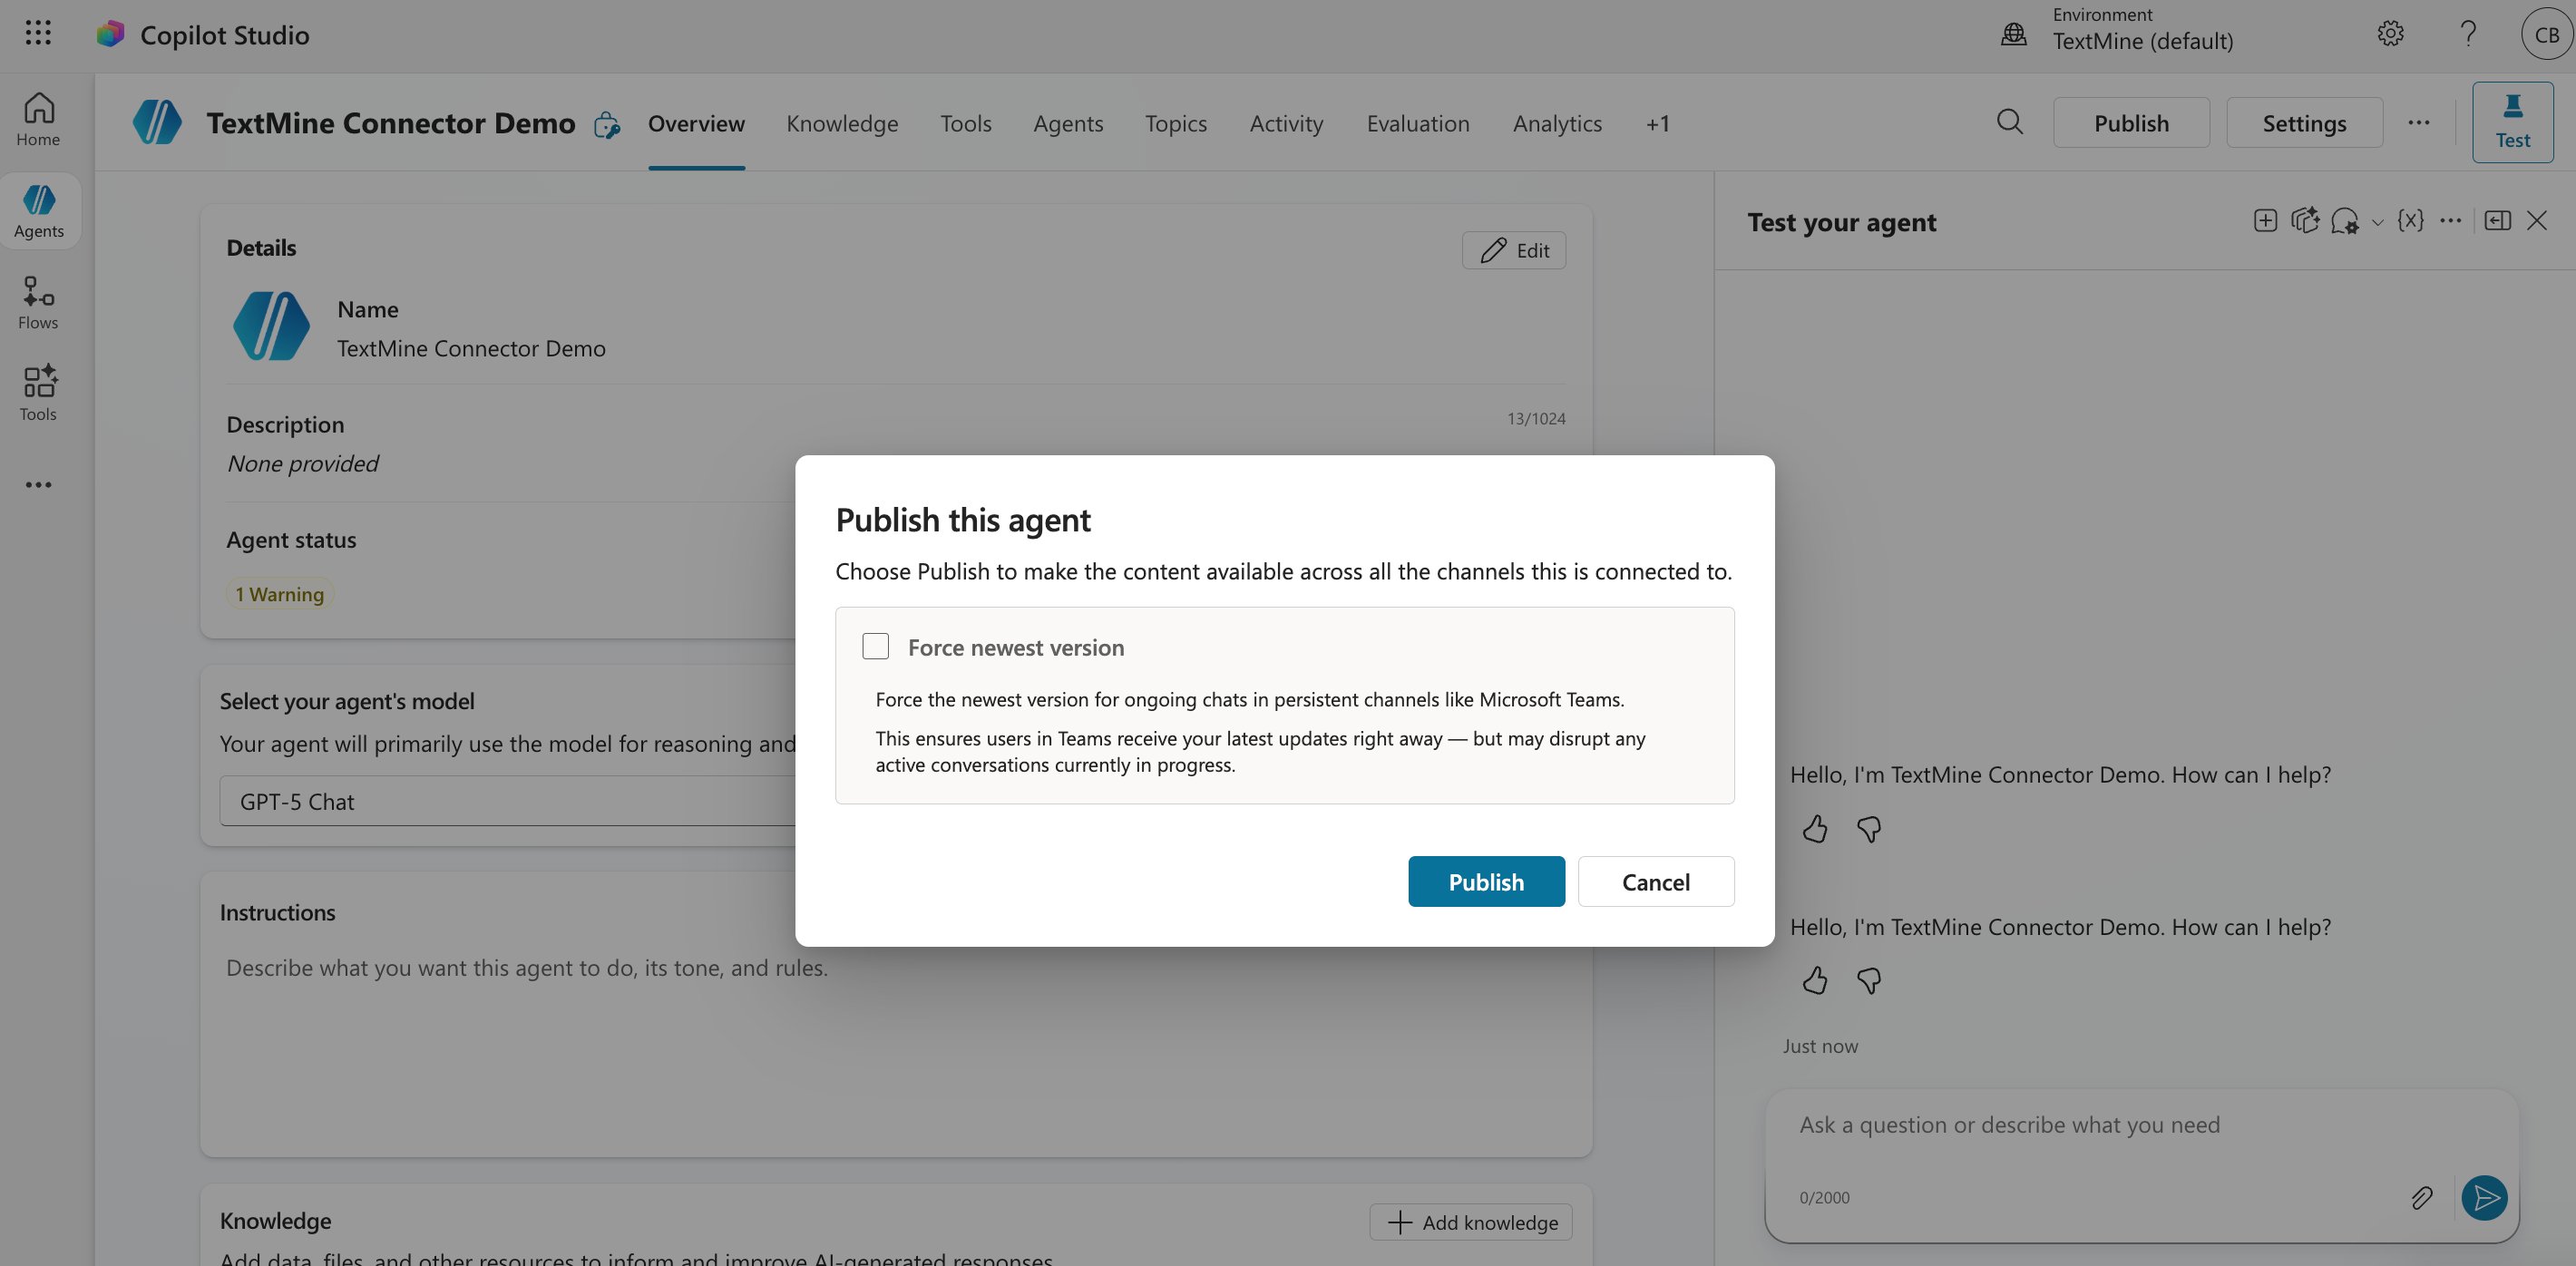
- When the test answers look right, select Publish.
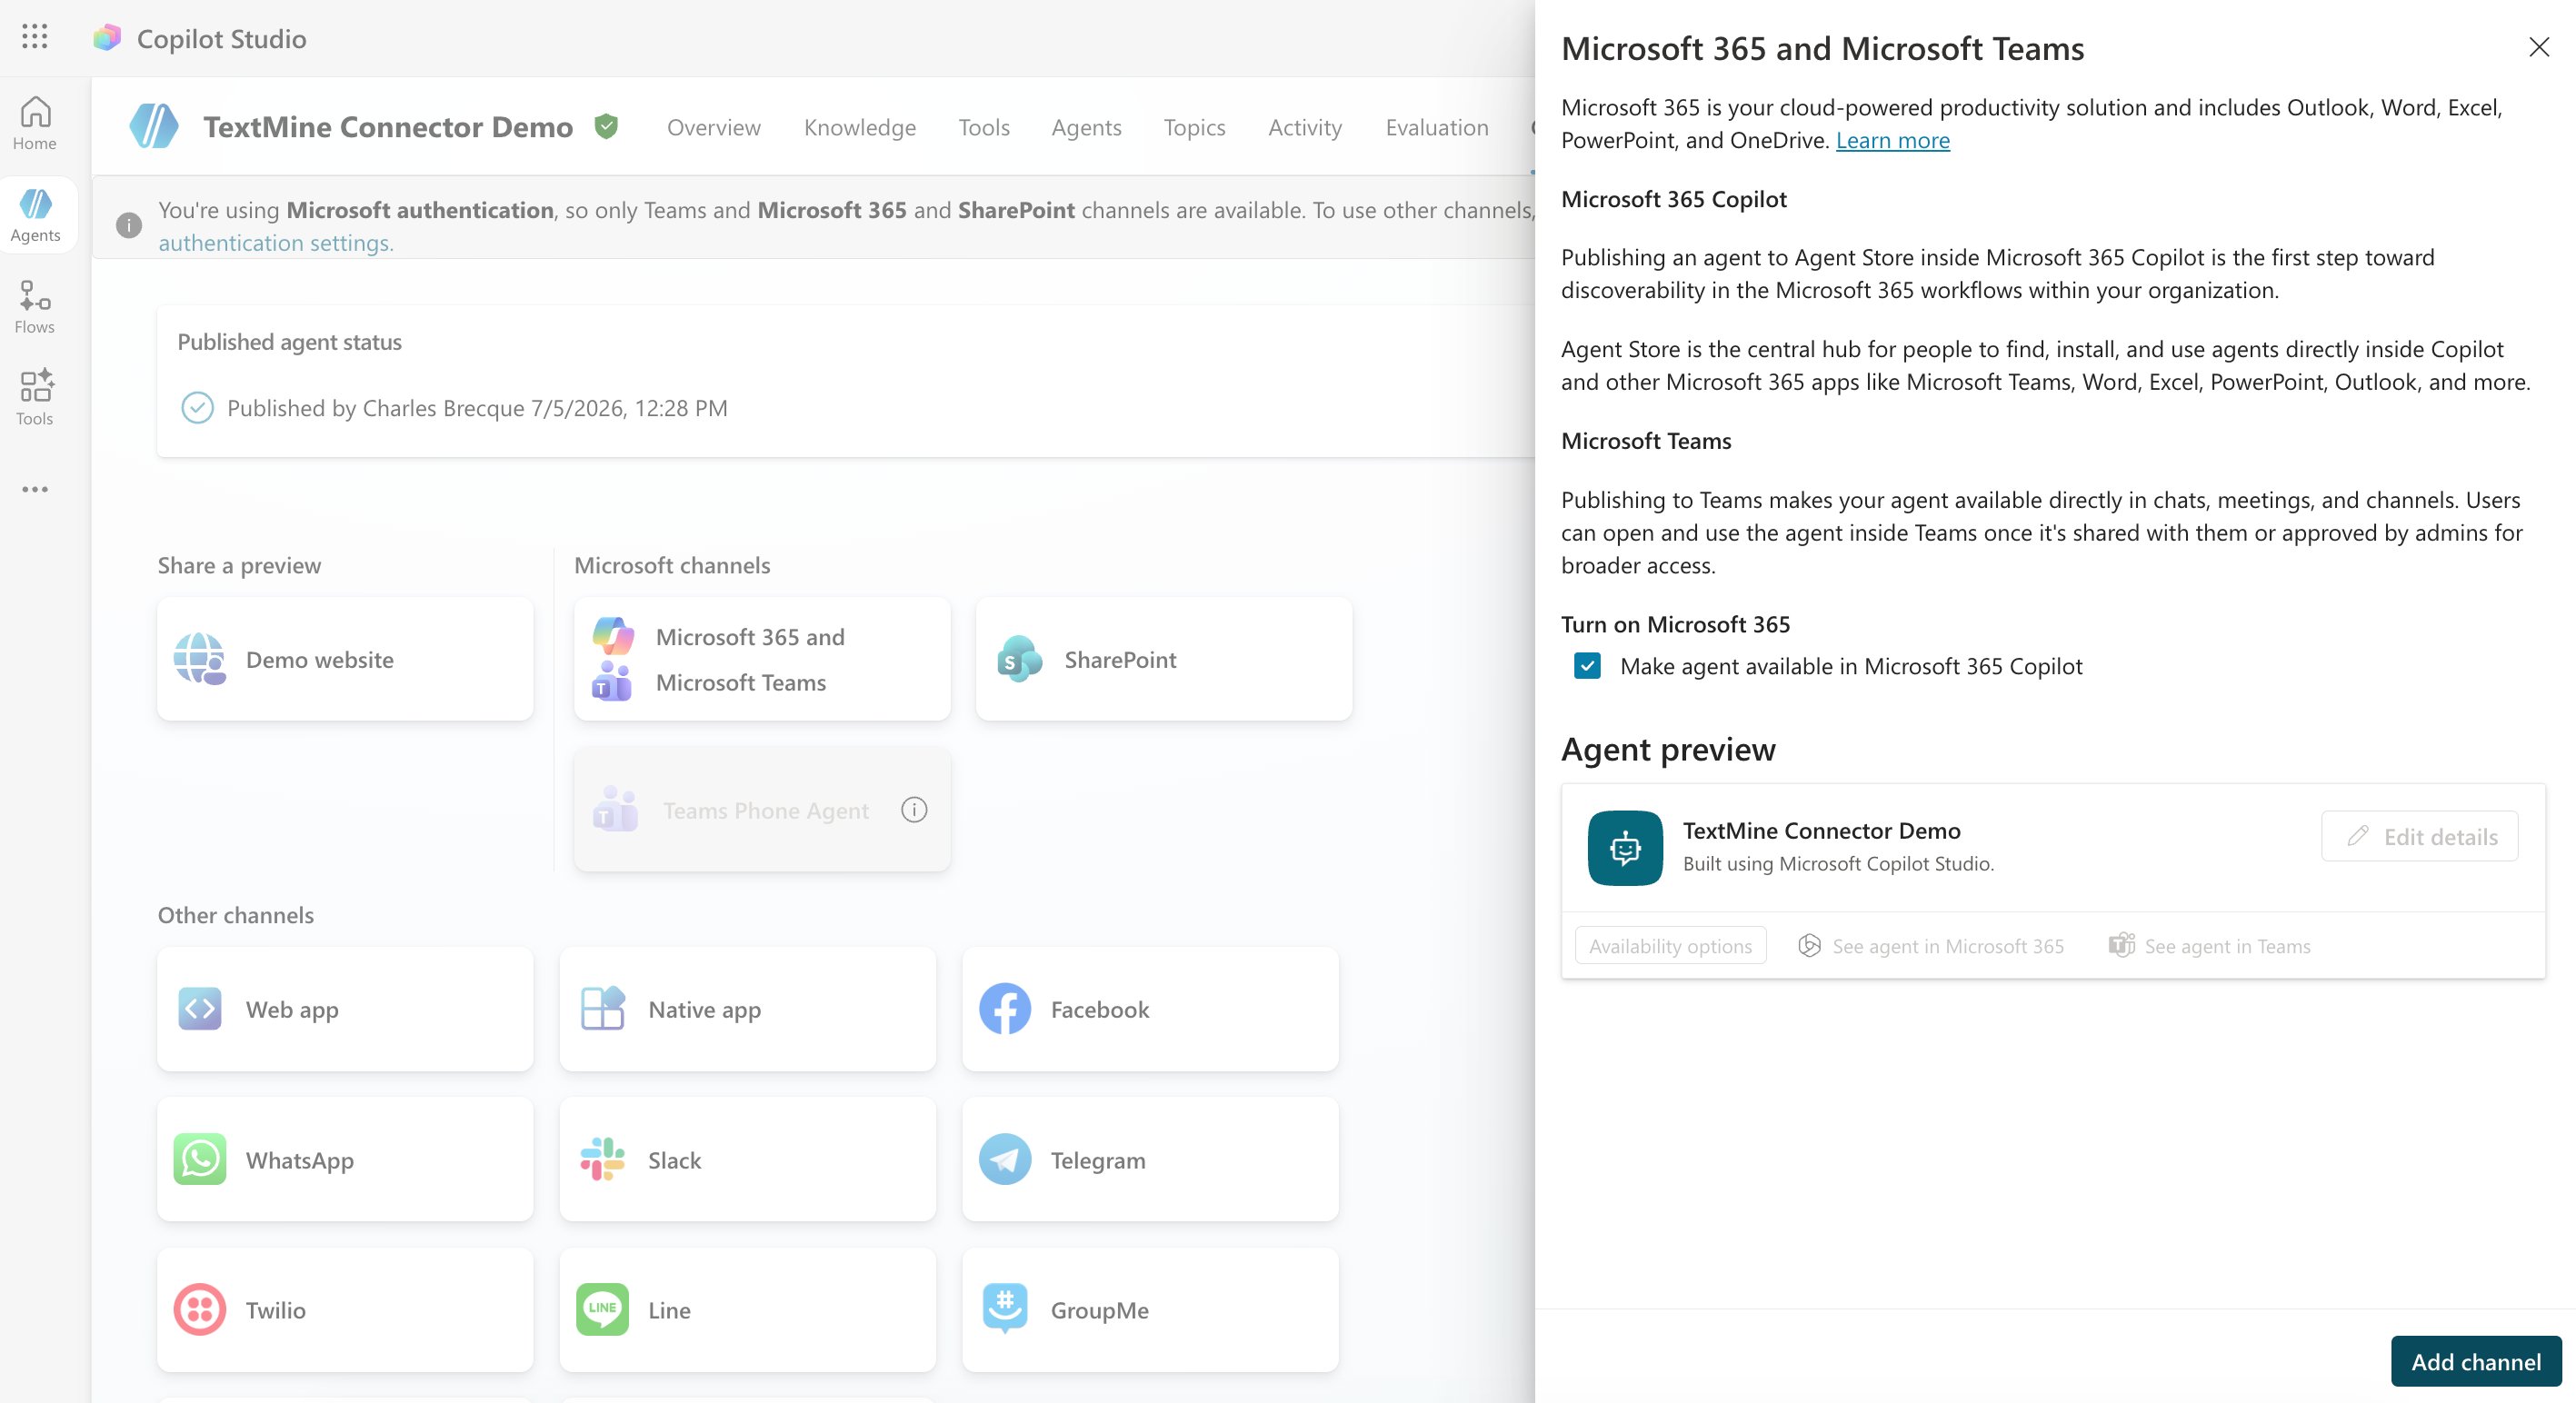
- After publishing completes, open the Channels tab.
- Add a channel.
- Select Microsoft Teams.
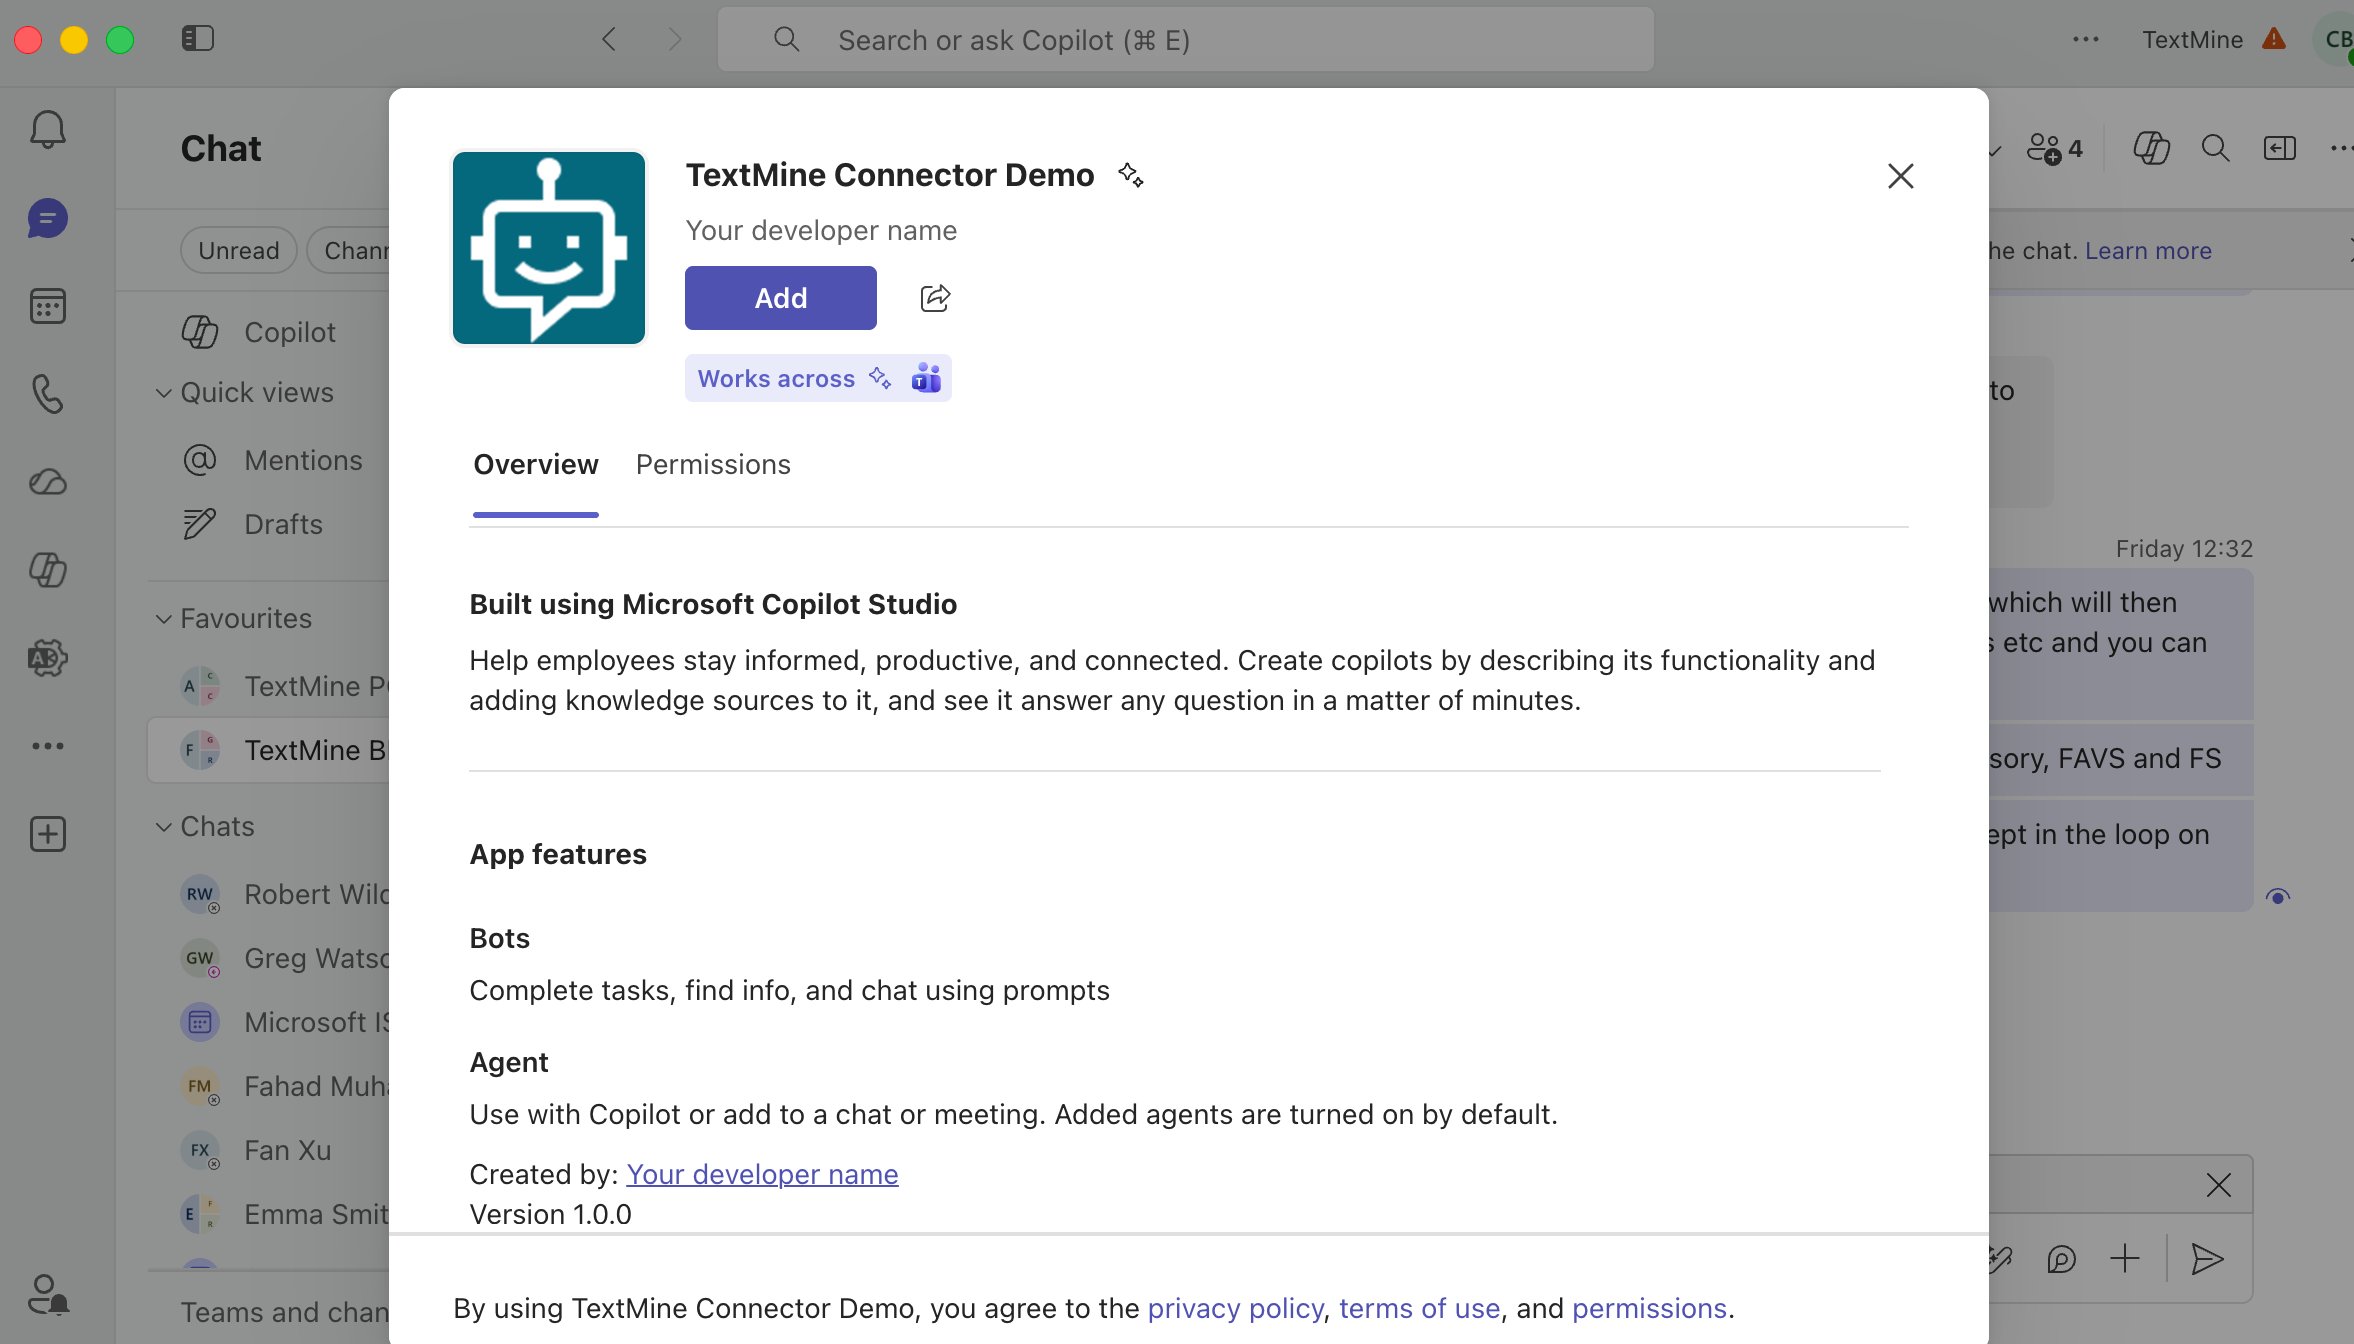
- Follow the Teams channel setup prompts to make the agent available in Teams.
- If the connection manager prompts you to revalidate, revalidate the TextMine MCP connection before continuing.
- Open the agent in Teams and ask a TextMine question to confirm the Teams experience works end to end.